
Give people outside your workspace one branded place to find answers and build skills. Use a Site for product or developer documentation, customer education, partner enablement, or another external academy. A Site brings selected courses, learning paths, and Knowledge Base documentation together. For internal team training, use workspace sharing and assignments. The examples use Northstar Product Academy · Demo.
Use the focused guides as you build:
- Curate courses, paths, and documentation.
- Design pages, branding, and navigation.
- Add API reference and visitor assistance.
- Manage access, onboarding, and the Site lifecycle.
1. Create the Site
- Open Organization → Sites.
- Choose New site.
- Enter the site name and choose Create.
- Confirm the editor opens with your site name and included Honen subdomain.
Sites must be enabled for your workspace. Your Honen administrator or account team can help with access.
2. Choose a layout
- Keep Default selected for the visual editor.
- In the right-hand Layout tab, choose a Template. The choices include Courses & documentation, Academy, Knowledge Base, and Developer docs.
- Expand Introduction and enter the heading and description.
- Choose Save and wait for Draft saved.
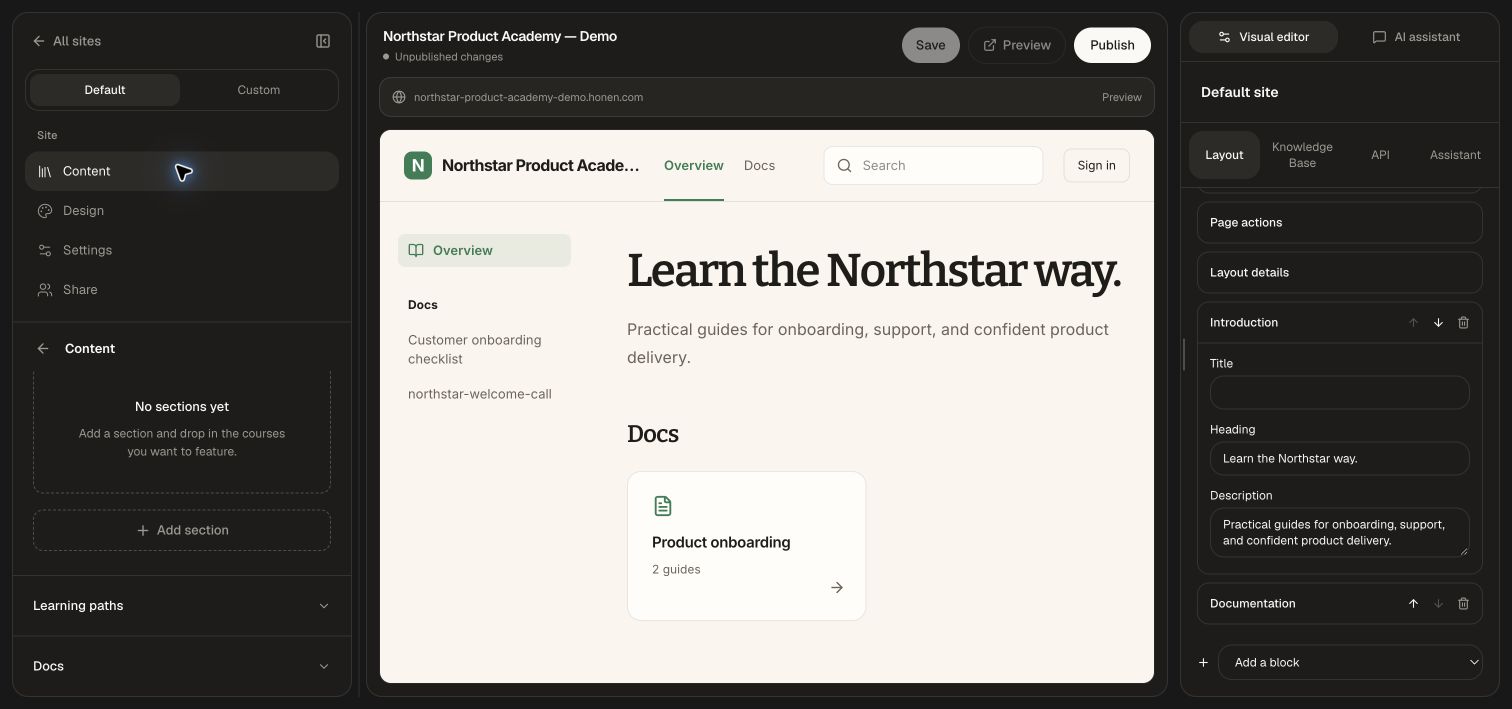
The preview updates while you edit. Save preserves the draft; Publish controls the public release.
3. Add Knowledge Base documentation
- Open Content on the left.
- Expand Docs.
- Enable Publish docs at /docs.
- Choose Add folder and search for the intended Knowledge Base folder.
- Choose Add beside the folder, then close the picker.
- Review its sidebar heading and the preview; choose Save.
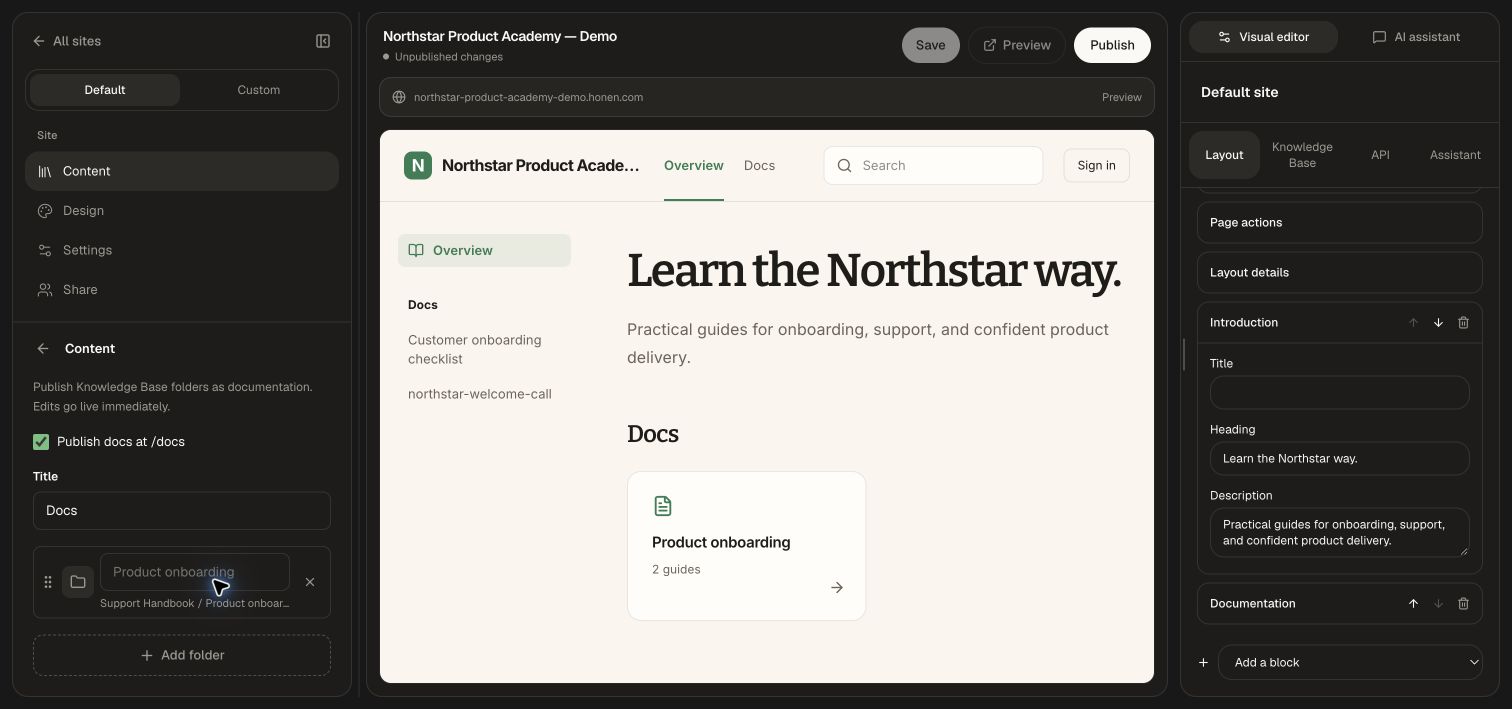
Only select content intended for the site's audience. The UI notes that document edits go live immediately; a content update is different from a layout draft. GitHub-synced folders can serve as the same source once imported into the Knowledge Base.
4. Add learning content
In Content, select catalogs to show their approved releases. Use Courses → Add section to curate course sections. Expand Learning paths for curricula. For a documentation-only site, those sections can remain unused.
5. Review access and address
- Open Settings.
- Review Visibility: Public, Unlisted, or Auth required.
- Decide whether search engines may index the site.
- Choose Public only for open documentation with no account flow, or Require sign-in to take courses for a learning experience that needs accounts.
- Save the settings you intend to apply.
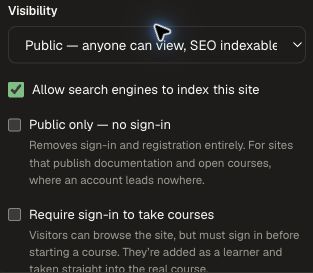
Under Address, inspect the included subdomain. For a custom hostname, enter a domain you control, choose Add domain, and complete the displayed DNS instructions. Wait for provisioning to finish before relying on the hostname.
Connect your custom domain
- In Settings → Address, enter the hostname you control and choose Add domain.
- Copy the displayed DNS record type, name, and value into your DNS provider. Use the values shown for this hostname.
- Return to the domain row and choose Re-check status to update its provisioning status.
- When the status is Active, open the HTTPS address and check the homepage and a nested page. The included Honen address remains available while your custom domain provisions.
A custom hostname such as academy.example.com and a path such as example.com/docs use different routing. Use the mount setup below for a path on an existing website.
6. Mount under an existing website
A path such as example.com/docs requires the existing website to proxy that path to the Site. In the Site's Mount path on another site, set the matching prefix such as /docs. Keep that prefix in the visitor's browser URL; configure the forwarding rule to strip the prefix before requesting the Site. For example, /docs/getting-started on the original website should request /getting-started from the Site.
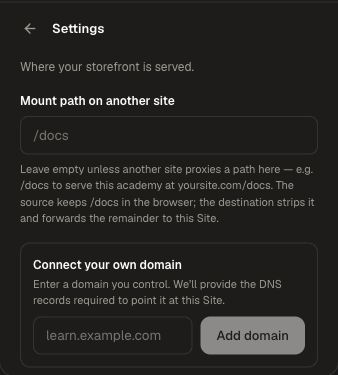
Configure the forwarding rule with the website owner, add the original website's origin to Allowed embedding origins, and test nested document links and images.
7. Publish and verify
After saving and reviewing the draft, choose Publish. Open the public address and verify the home page, a nested documentation page, images, search, and the expected sign-in behavior as an ordinary visitor.
8. Welcome learners into a program
- Publish the courses and curriculum for your audience, then include them in the Site’s selected catalogs or learning paths.
- For a customer or partner program, choose the sign-in experience that lets visitors take courses and retain their progress. Use Public only for open documentation.
- Open the academy as a new visitor, find a course or learning path, and follow its start action and sign-in prompts.
- New learners signing in through the Site join its external learner group and receive access to the learning content available through that Site. Existing internal workspace members keep their workspace membership.
- Manage named cohorts and their required work with assignments when they need a due date and completion requirements. The Site remains the external place to browse and enter the program.
- Follow activity in Analytics and Reporting. Learners who meet a certificate-enabled curriculum’s requirements can download and share their credential.
Use this sequence for customer onboarding, partner enablement, or a sponsored learning program: focused content, a branded entry point, a clear learning path, and reporting for the intended cohort.
For repository-backed content, follow GitHub sync. Review access and roles and catalog distribution before choosing the public audience.