
Use LTI 1.3 when your LMS supports a registered external learning tool. Honen supports launches, Deep Linking, Assignment and Grade Services (AGS), and Names and Role Provisioning Services (NRPS). The LMS must enable the services your workflow needs.
1. Choose the platform
- Open Organization → Integrations → Your LMS.
- Select Canvas, Moodle, Blackboard, Brightspace, Skilljar, or Another LMS with LTI 1.3.
- Read the displayed integration guide. Canvas and Moodle have platform-specific paths; Blackboard and Brightspace use Other LTI 1.3. Skilljar is manual and launch-only: its setup does not offer Deep Linking, AGS grades, or NRPS roster sync.
- Set the app branding and review how learners open Honen and what they land on.
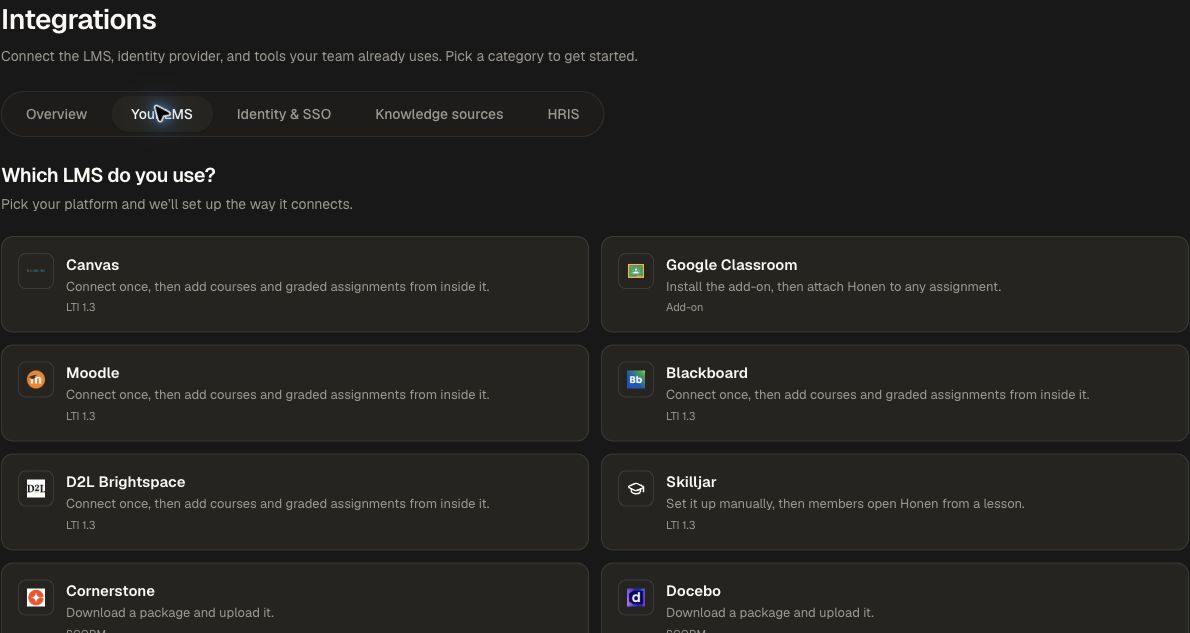
Follow the dedicated guides for Canvas, Moodle, or manual registration for Skilljar, Blackboard, Brightspace, and other LTI platforms.
2. Register the tool
Use dynamic registration where the LMS supports it. Copy the setup URL from Honen into the LMS administrator's registration flow. Keep the generated setup token private.
For manual registration, use the values shown by the setup screen. The standard endpoints are:
| Setting | URL |
|---|---|
| Login initiation | https://honen.com/api/lti/login |
| Launch and redirect URI | https://honen.com/api/lti/launch |
| Tool public keys | https://honen.com/api/lti/jwks |
Complete the LMS's enablement and deployment steps and enter its required issuer, client, and deployment information in the connection. Register the tool using LTI 1.3.
3. Place content and test
- For a connection with Deep Linking enabled, open the LMS's external-tool content picker as an instructor.
- Select the Honen content to place in the course. For a launch-only connection such as Skilljar, configure the tool placement using its manual setup guide instead.
- Launch the placement as a test learner and verify the intended course or assignment opens.
- If using NRPS, sync the LMS context roster and check the mapped Honen group.
- If using AGS, complete a sample requirement and verify the expected grade in the LMS.
Enable and review roster sync and grade services separately, then check the instructor and learner experiences.
4. Choose the learner launch and landing page
Under How learners open Honen, choose:
- Embedded: open the learning experience inside the LMS window.
- Open in new tab: open a full browser tab from the LMS.
- Always show button: give the learner an Open in Honen handoff.
Under What learners land on, choose Honen hub for a class launcher or Straight to content for the linked content. For the hub experience, also choose Open in place or Open in new tab for course navigation.
Choose these options before copying the dynamic registration URL. On a saved connection, use Edit settings and Save settings.
5. Set the grade policy
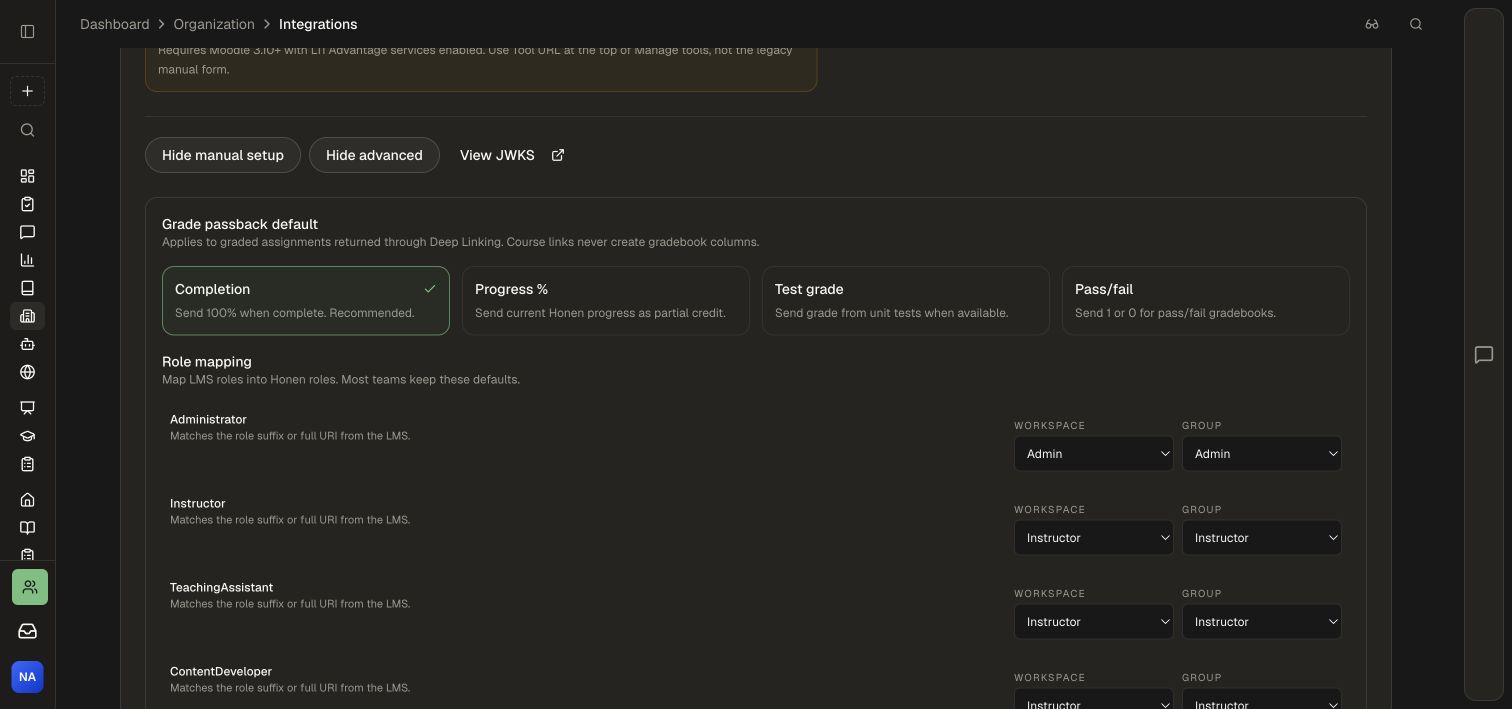
Open Advanced options → Grade passback default for a platform with AGS. Choose a policy that matches the result your program needs to report:
| Policy | Reported result |
|---|---|
| Completion | 100% when the assignment is complete |
| Progress % | Milestones: 0% before starting, 50% after starting, and 100% on completion |
| Pass/fail | 1 when complete; 0 before completion |
Use Completion for completion credit or Pass/fail for a binary completion result. Use a graded assignment returned through Deep Linking for gradebook reporting. A plain course link is a navigation entry point.
6. Map roles and review the class group
Under Role mapping, review both the Workspace and Group role for each incoming LMS role. Defaults map Administrator to Admin, Instructor/TeachingAssistant/ContentDeveloper to Instructor, and Learner/Member to Member. Select the appropriate workspace or group role when your governance model needs a different mapping.
The LMS class context maps to a Honen group. When using NRPS, inspect the synced class membership as well as a fresh learner launch. Create and manage groups explains the group tools used after provisioning.
7. Manage an existing connection
- Find the platform under Your LMS connections.
- Inspect the issuer, client ID, mapped group/link counts, launch mode, and passback policy.
- Open Edit settings, make the intended change, and choose Save settings.
- Review the secure launch-domain status. Use Re-check when checking provisioning progress.
- Test the affected instructor and learner journeys.
Use the connection switch to manage its enabled state. Plan a replacement route for live learner placements before choosing Disconnect. Branding saved for a new Honen registration should be coordinated with the installed app's branding in the LMS.
Check your setup
Check the exact issuer, client ID, deployment ID, redirect URI, and keys against the LMS registration. Review the selected grade policy and available LMS scopes when grades do not appear. Use the displayed new-tab option where the embedded experience cannot establish a session.
Work with your LMS administrator to complete registration and a learner launch. For platform-specific setup, follow Connect Canvas or Connect Moodle.
If the LMS accepts packages instead of an external-tool registration, use SCORM or cmi5. Google Classroom uses its own add-on workflow.