
Give learners a direct route from your authenticated application into Honen. Your backend signs a short-lived assertion; Honen validates it against the public keys registered for your workspace.
This setup is for your application engineers and a Honen administrator with Manage integrations permission. For an identity provider's standard login flow, use OpenID Connect.
1. Prepare the signing contract
- Choose a stable issuer identifier for your application.
- Generate an RS256 or ES256 key pair on your backend.
- Give each public key a unique key ID, or
kid. - Export the public keys as a JWKS document:
{"keys":[...]}. - Keep the private signing key in your backend's secret storage.
Honen receives the public key. Your backend creates a fresh signed assertion for each launch.
2. Create the connection
- Open Organization → Integrations → Identity & SSO.
- Find Custom Signed JWT → Connect signed SSO.
- Enter Expected issuer and the Public JWKS.
- Choose Default member role and Just-in-time provisioning.
- Review Allow account-wide session requests for your intended learner experience.
- Select Create connection.
- Copy the generated Audience and Redeem URL into your backend's configuration.
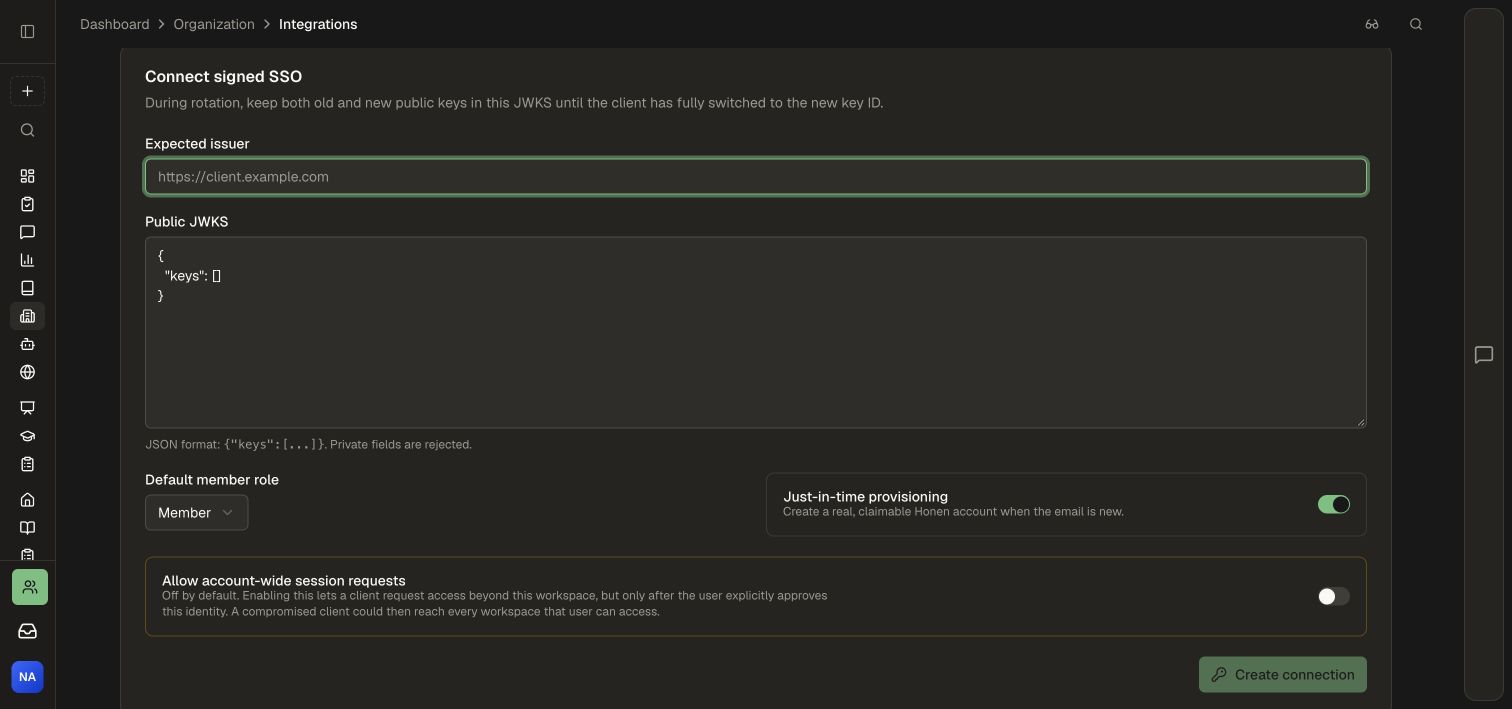
The example shows the form before registering keys. Use Setup guide for your engineers on the same page for the signing examples and launch contract.
3. Create a fresh launch assertion
Include these values in the signed JWT:
| Value | What to send |
|---|---|
iss |
The exact expected issuer registered in Honen |
aud |
The audience generated by Honen |
sub |
A stable user ID from your system |
email, email_verified, name |
Current email, boolean true, and display name |
iat, nbf, exp |
Integer timestamps; expiration no more than 60 seconds after issue time |
jti |
A unique random identifier for this launch |
course_id |
Optional course to open, available in the connected workspace |
session_scope |
workspace for the usual focused launch; account when approved for that identity |
Use the registered kid and supported signing algorithm in the JWT header. Generate a new assertion for every launch, including retries.
4. Launch and verify
- Have the browser submit an HTML form to the saved Redeem URL.
- Use
POSTwithapplication/x-www-form-urlencodedand anassertionfield containing the signed JWT. HTML-escape the value when generating markup. - Let Honen redirect to the selected course or workspace home.
- Complete account linking if the learner already has a matching Honen account and is prompted to confirm it.
- Check the workspace, role, and intended course access with a test user.
- Return to the integration and inspect Last successful launch.
Your portal authenticates the user before it signs an assertion. Review SSO and identity to align provisioning, account linking, and session scope with your rollout.
5. Rotate keys and manage access
- Generate a new key pair and unique
kid. - Add the new public key alongside the existing key in Public JWKS.
- Choose Save and rotate keys.
- Deploy your backend signer using the new key.
- Verify a fresh launch, then remove the old public key after the maximum assertion lifetime and your planned transition window.
Use the connection switch to manage new launches. Revoke all keys disables the connection and clears its registered keys; existing sessions are managed separately.
For learning progress or reporting in your portal, configure a separate Connector API integration. SSO establishes the learner's session, while the API provides the learning data your application is permitted to read.