
Use Organization to manage your team, and My groups to work with a particular cohort. These examples use the fictional Northstar Academy · Demo workspace.
1. Create a group
- Open Organization → Manage Groups.
- Choose Create Group.
- Enter a descriptive name, such as Product Onboarding · Documentation Demo.
- Add an optional description explaining who belongs in the group.
- Choose Create. The group appears in the list; open its name to continue.
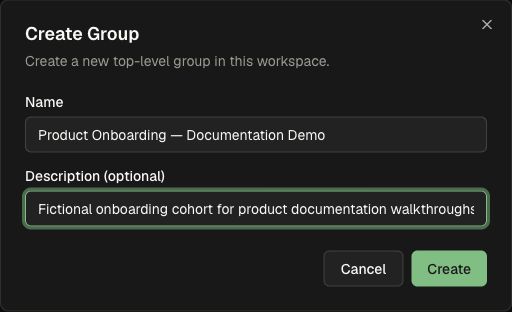
The group creator is added automatically, ready to organize the cohort.
2. Organize the group's learning
- Open the group and use Home to arrange its learning home page.
- Use Courses for course access and Assignments for work with a completion requirement.
- Open Curricula → Add curricula to select a published learning path.
- Search for the curriculum and add the intended result.
- Choose Done after reviewing the selected content.
Publish the curriculum before selecting it for a group. This keeps the group’s learning path focused on content ready for delivery.
For the complete workflow, including subgroups, membership changes, catalog access, home-page sections, and group settings, follow Create and manage groups.
3. Prepare a member invitation
- Open Organization → Manage Members.
- Choose Add Member → Add one member. Add multiple members opens the bulk invitation path.
- Enter the person's email. First name, last name, title, and tags are optional.
- Choose the appropriate Role and optional Assign to Group.
- Review the email, group, role, and the seat-cost notice, then choose Add & Send Invite when ready.
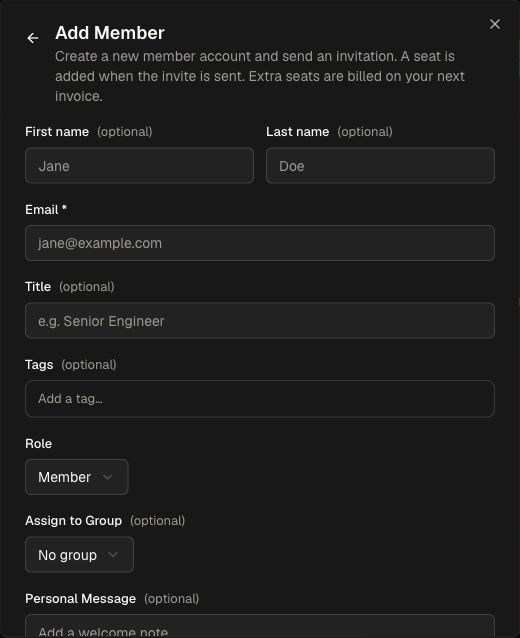
Add & Send Invite emails the invitation immediately. The person appears under pending invitations until they accept. Review the displayed seat information before sending.
Invite a cohort with a CSV
- Open Add Member → Add multiple members.
- Add a row for each person, or choose Import CSV to load your roster.
- Review each imported email, name, role, and group before sending.
- Choose Send invites. Track acceptance in the Members page’s pending invitations.
Choose Member for learners, Instructor for people creating and assigning learning, or Admin for workspace administration. Review your workspace’s role definitions when it uses custom roles.
You can also ask the Workspace Assistant to invite a person or cohort. Include the exact email addresses, role, and group, for example: Invite [email address] as a Member of the Product onboarding group. Replace [email address] with the intended recipient's address. Sending this request can send invitations, so use the recipients and role you intend.
4. Find and maintain members
The Members page provides a text search plus All Roles, All Status, and All Groups filters. Use List or Tree to change the arrangement and Columns to choose visible fields. Open a person's name for their detail page. Pending invitations remain distinct from active members.
For a group's name or description, open Group settings, edit the fields, and choose Save Changes. Workspace roles and group roles can have different scopes; see Access, roles, and safe publishing.
For AI credits, invoices, and seat charges, see How billing works.
Tips for a smooth setup
- Workspace and role: confirm the intended workspace and use a role with the management permissions you need.
- Ready-to-deliver curricula: publish the learning path in the intended workspace before adding it to a group.
- Invitation follow-up: review pending status and the invitation email before sending another invitation.
Build a curriculum and certificate before adding a learning path, or create an assignment for a particular course.