
A curriculum orders several courses into a learning path and can issue a certificate on completion. Prepare the curriculum as a hidden draft before making it available to learners.
1. Create the curriculum
- Open Organization → Manage Curricula.
- Choose New curriculum.
- Enter Title, Slug, and Description.
- Explain Why this curriculum and enter Learning outcomes, one per line.
- Add a cover with Generate or Upload if needed.
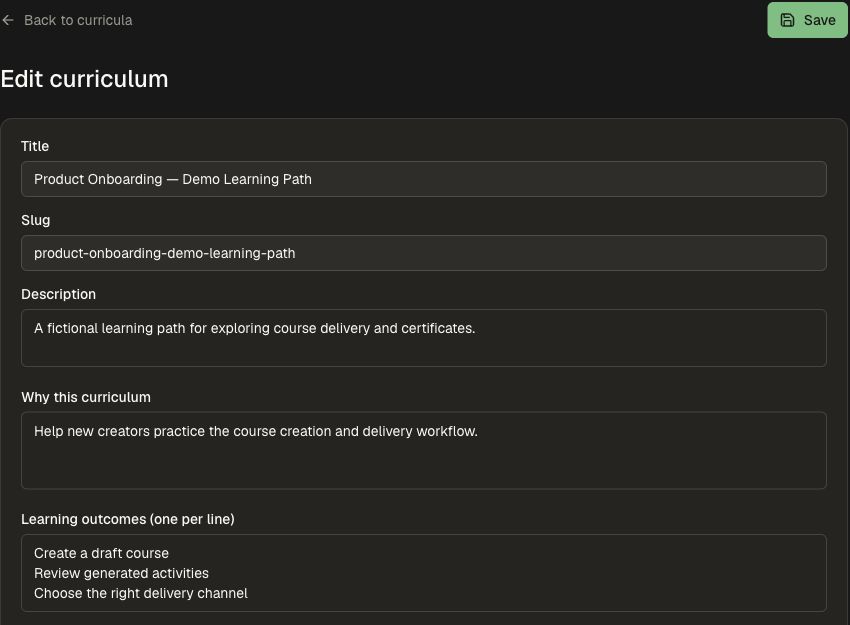
The slug is the readable identifier used for the learning path. Use a stable, descriptive value.
2. Add and order courses
- Scroll to Add existing courses.
- Search for the intended course.
- Choose its exact title and cover.
- Use Move up and Move down beside selected courses to set the order.
- Remove an accidental selection with Remove course.
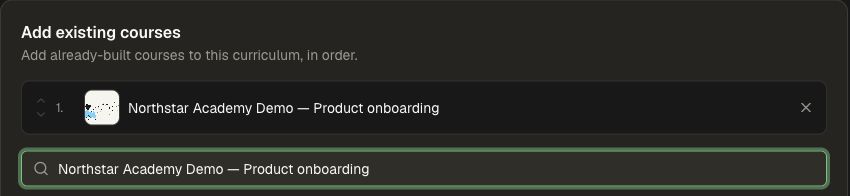
Use Planned courses → Add a planned course when you want to sketch the structure before building every course. An existing course can be attached while the curriculum remains a draft.
3. Configure the certificate
- Enable Certificate.
- Set Certificate name and Certificate description.
- Review Require all courses. When on, every attached course must be completed; when off, completing any one attached course can satisfy this rule.
- Choose Classic, Modern, or Minimal for the design.
- Set workspace name, accent color, logo, signatory name/title, optional signature image, and body text.
- Inspect the preview before saving.
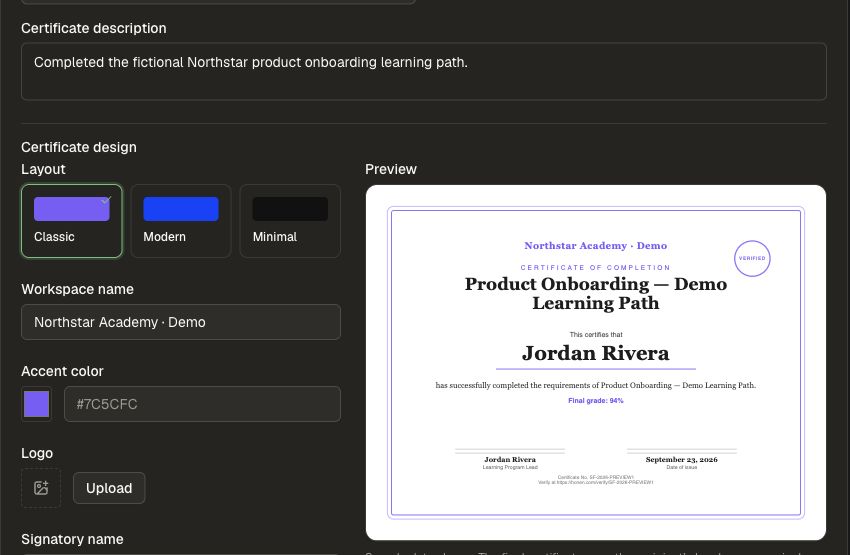
The preview uses sample details so you can check the design. Share publicly controls the curriculum landing page; issued certificates have their own public verification link.
4. Save and deliver
- Leave Published off to keep the curriculum a Hidden draft.
- Leave Share publicly off unless you intend to expose the curriculum's public landing page.
- Choose Save.
- Confirm the curriculum card shows its title and course count.
- Once approved for delivery, publish it and add it through a group's Curricula → Add curricula or a Site's Learning paths controls.
Use a hidden draft to prepare the learning path, then publish it when its courses and certificate design are ready.
5. Earn, verify, and share a certificate
Learners earn a curriculum certificate by meeting its configured course-completion and grade requirements. Certificate viewing and sharing require the workspace’s certifications feature.
- Open the learning path and complete its required courses. Follow the progress shown on the curriculum page.
- Once the certificate is issued, choose View certificate, or open Achievements → Certificates.
- Review the curriculum name, issue date, grade, and Certificate No.
- Choose Download PDF to keep a copy, or Verify to open the public verification page.
- Use Add to LinkedIn to open LinkedIn’s certification form with the credential name, issue date, verification link, and certificate number filled in. Review it there before saving.
- Share the verification page when someone needs to confirm the credential and its current status.
The certificate design preview helps you prepare the appearance. Issued certificates carry the actual learner details and verification number. Verification links are public to anyone who has the link.
Tips for a smooth setup
Publish the saved curriculum before adding it to a group. When course search returns similar titles, use the cover and exact name to select the intended course.
Next, link the published path to a group, include it in a catalog, or add it to an academy. Use Assignments for a course with explicit recipients and completion criteria.