
Bring your team's working documents into Honen, then turn selected material into training. Link a focused folder when you want its supported files to stay together as the source changes.
Choose the connection
| Source | What to select | Useful material |
|---|---|---|
| Google Drive | Individual files or a folder in Google's picker | Google Docs, Slides, Sheets, Drawings, and supported uploaded files. |
| OneDrive | Files or a folder in Honen's picker | Office documents, PDFs, images, videos, Markdown, text, and supported spreadsheets. |
| SharePoint | A site, document library, folder, or individual files | Team procedures and shared document collections. |
The connection uses the account you sign in with. The provider's consent screen describes its read access; the items you subsequently select determine what Honen imports. In Honen, choose the destination folder for the audience that should read those copies.
Google Drive: link a document or folder
- Open Knowledge Base, open the destination folder, and choose Add an integration from its add menu.
- In Content sources, find Google Drive and choose Connect.
- Complete Google's sign-in and consent, then return to Honen. Confirm the connection is shown as connected.
- Return to the destination folder and choose Add from Google Drive.
- In Google's picker, select the files or folder you want and confirm the selection.
- Wait for the imported items to finish processing. Open a document and inspect its text and images.
Google Docs are read as document text. Slides retain their presentation content for extraction, Sheets are read through a PDF export, and Drawings through an image export. Review sheet print layout, slide diagrams, and drawing labels in the imported result. For a large native document that Google cannot export, download a supported copy and use Import file.
OneDrive: link files or a folder
- Open Knowledge Base → Add an integration → Content sources.
- Find OneDrive, select Connect, and complete the Microsoft sign-in and consent.
- Return to your destination folder and choose Add from OneDrive.
- Open folders to browse. Select a file's checkbox for that file, or a folder's checkbox to include its supported descendants.
- Check the selected count and choose Add selected.
- Open the resulting Knowledge Base item when processing completes. Check that headings, tables, and images are readable.
Use Search OneDrive… to filter the loaded items. Open the relevant folder and use Load more when available to see additional results.
SharePoint: choose the right library
- In Content sources, choose Connect for SharePoint and complete Microsoft's sign-in and consent.
- In your Knowledge Base destination folder, choose Add from SharePoint.
- Browse the site, then its document library and folders. The picker breadcrumbs let you return to a parent location.
- Select individual files for a focused lesson, a folder for a maintained collection, or the broader site/library when you intend to import that collection.
- Review the selected count, choose Add selected, and wait for processing.
- Open representative documents and check their titles, body text, images, and original-source links.
OneDrive and SharePoint read Markdown, text, and CSV as text. Supported Excel files, OpenDocument files, and RTF are converted to PDF for reading. A linked spreadsheet supplies learning material; it does not become a live editable spreadsheet inside the course.
Turn the imported files into a course
- Choose Create → Attach → Add from knowledge base.
- Open your imported folder, select the specific documents, and choose Add selected. Wait for the ready attachment indicators.
- Write a brief that names the source and the desired behavior. For example: “Use the attached onboarding procedure and training deck to teach new support teammates how to prepare and complete a welcome call.”
- Answer the audience, starting-level, structure, and size questions that Honen asks.
- Review the outline and choose Approve & Build when its topics and activities fit the source.
- Open Review & edit. Check facts and source images, then try each activity in Preview.
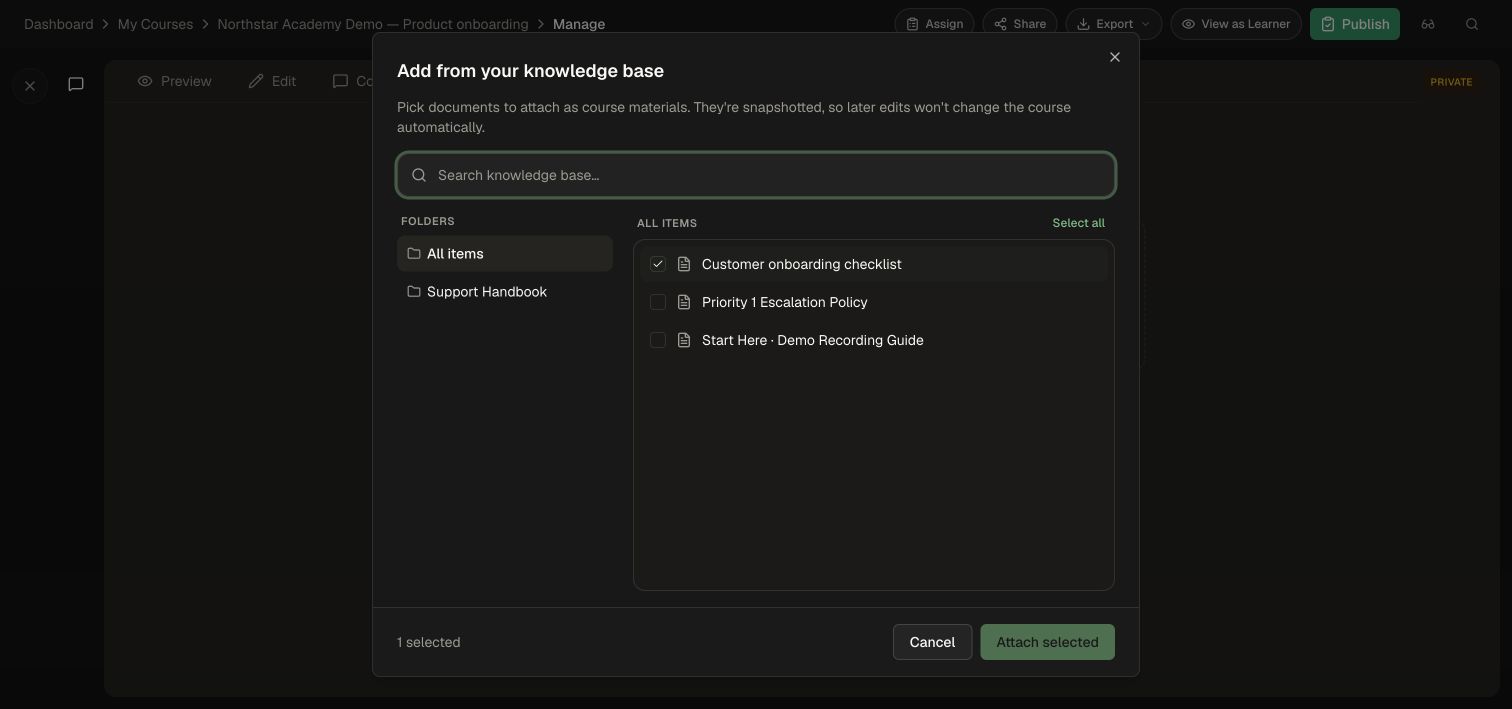
For an existing course, use Materials → Add from knowledge base → Attach selected, then ask the editor assistant for a specific lesson update. See Add sources to a course.
Keep the training current
Update the original document in its source system, then use Refresh on its linked Knowledge Base item when you want to check for the latest version. Open the updated copy and review the changed section. In the course, use Refresh from KB on the material, revise the affected activities, and preview them before publishing. Follow Build and maintain source-backed learning.