
Projects give learners a task to perform: a conversation, a guided procedure, an AI-assisted artifact, a programming exercise, or a clickable walkthrough. Choose a format that matches the work and the equipment learners will use.
The examples use fictional content in Northstar Academy · Demo. Start with Add sources to a course when your project should follow an existing procedure.
Open a project in the course editor
- Open the course's manage screen and select Edit.
- Select a project in the course outline. If you need a new project, ask the course editor assistant to add one to a named unit, specifying its type and what the learner should demonstrate.
- For an unconfigured project, use Choose a template to select the format. Configured projects open their existing editor.
- Attach the relevant course materials and describe the result learners should produce.
- After editing, use that project's save control and reopen it to check the saved configuration. Saving a project draft is separate from publishing the course.
For example: “Add a Scenario project to Product onboarding. The learner should ask a fictional customer about their training goal and confirm the next step. Use fictional names and three clear evaluation criteria.”
Scenario: practice a conversation
Use Scenario to rehearse customer conversations, coaching, interviews, or other interactions with AI characters. Start with a written description of the situation and the skills learners should practice.
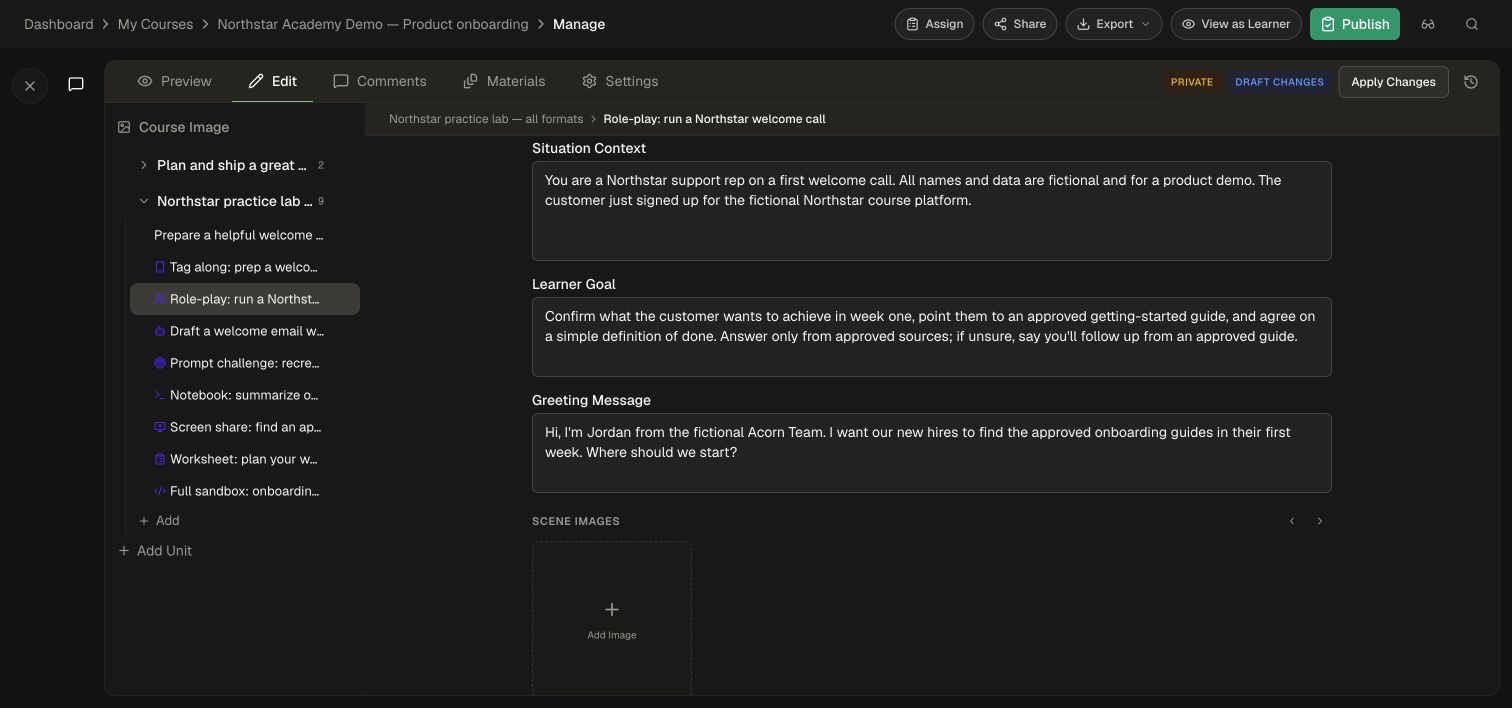
- Describe the setting, characters, learner goal, and behavior to evaluate under Create your scenario.
- Enable Scene Images if the scenario needs visual aids, then select Generate Scenario.
- In Story, review Situation Context, Learner Goal, and Greeting Message.
- In Characters, edit each character's Name, Role, Description, Personality, and Knowledge. Use Add Character when the role-play needs another participant. Review the selected Voice and generated portrait.
- In Evaluation, edit the criteria and their weights. Make each criterion describe observable learner behavior.
- In Settings, choose Text Only, Voice Only, or Text & Voice. Review Custom Prompt Instructions and the optional Finish Button Label.
- If appropriate, configure Language Learning, its target/source languages, and voice-session recording options. Use Record sessions to retain voice conversations.
- Select Save, then open the learner view to try the conversation and its evaluation.
Choose Text Only for typed conversation. For voice practice, connect a microphone and allow browser microphone access. Configure recording and learner replay to suit your program. Use direct field edits for small refinements or Regenerate to create a new version.
Complete a text role-play
- Read Your mission, including the situation, goal, and character, then select Start scenario.
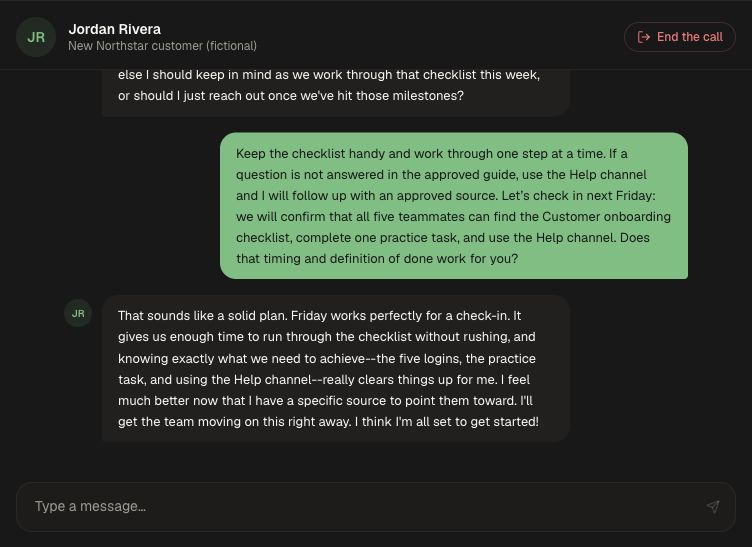
- Type in Message to Jordan Rivera and select Send message. In this example, start by asking what Acorn Team wants to achieve in its first week.
- Use the character’s reply to guide the conversation. Recommend the Customer onboarding checklist, agree on one practice task and the Help channel, then confirm a Friday check-in.
- Select End the call when the conversation is complete.
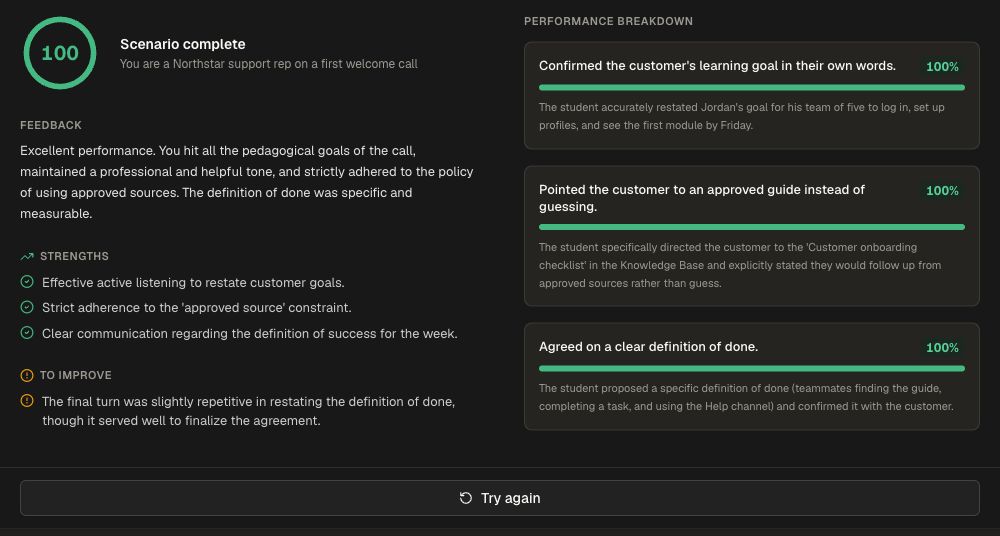
- Review the score, Feedback, Strengths, To improve, and Performance breakdown. Select Try again for another practice round.
Tagalong: guide a physical task
Use Tagalong when a learner will show an in-person task through a phone camera. Prepare concrete steps that can be recognized visually.
- Select Tagalong and choose Describe or Video under Create Tagalong. You can also choose Skip to create the steps manually.
- For Describe, explain the physical task. Use Attach file if an approved procedure document should inform the steps, then choose Generate Steps.
- For Video, choose Upload a phone video. The picker accepts MP4, WebM, or MOV up to 500 MB. Review the selected recording, then choose Generate from Video.
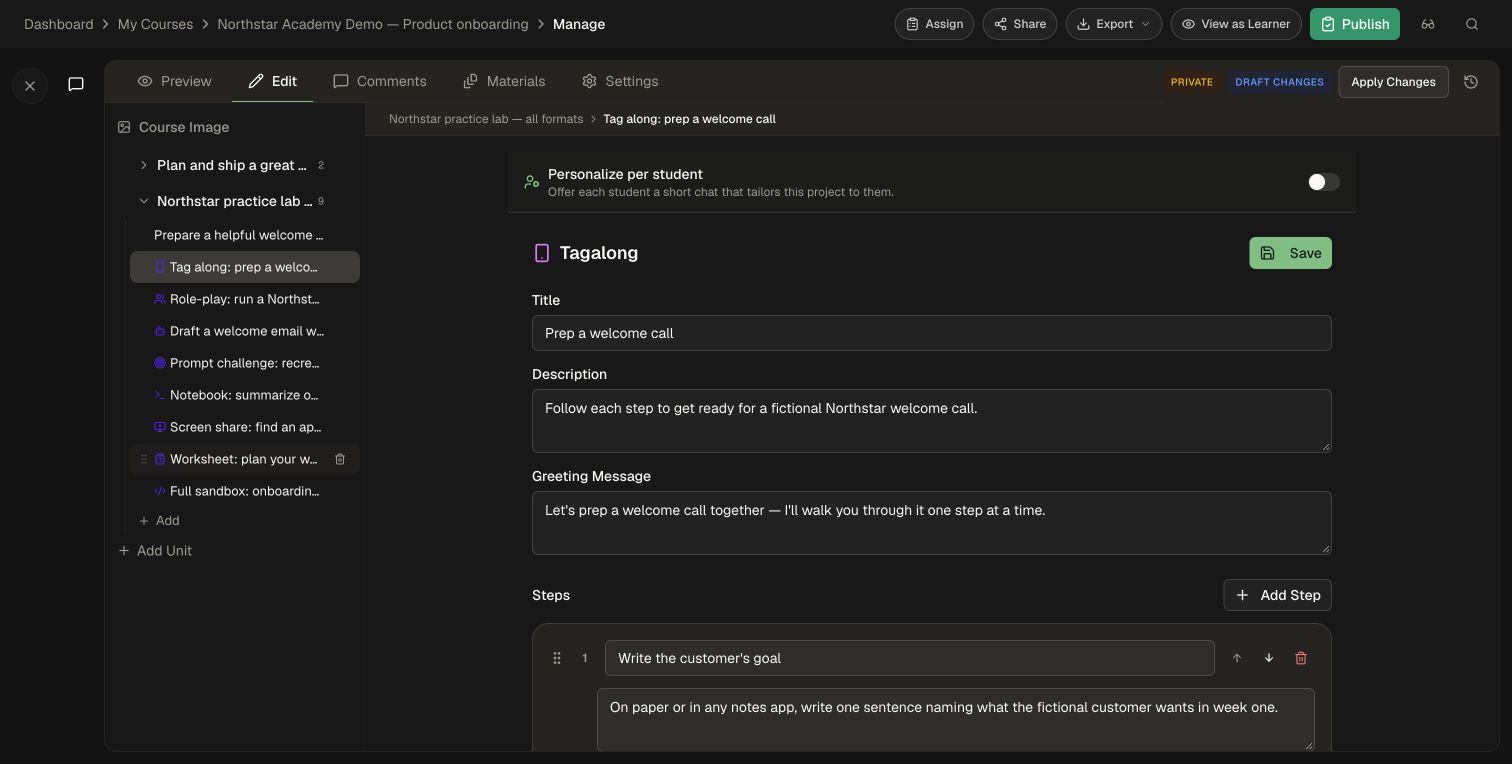
- Edit Title, Description, and Greeting Message.
- Review Steps. Each needs a title, a physical action, and an optional hint. Use Add Step, Move step up, Move step down, and Remove step to arrange the procedure.
- To attach a reference to a step, choose Add link or reference, select URL or Image, enter the URL and an optional label, and choose Add. Select Save, reopen the project, and check the step order, text, and references.
- In the learner view, choose Start session, follow the phone-pairing flow, and allow the requested camera and microphone access. Test whether the actual camera view makes each required action visible.
Step references open from the desktop learner step list and session checklist. Link to resources your learners can access.
Align each step with the procedure learners will perform, and frame the camera so the required action is visible.
Use an Agent: create an artifact with AI
This is a learner project format, separate from the workspace Agents administration area.
- Select Use an Agent.
- Choose Image Generation, HTML & Web, Writing & Research, Spreadsheet, or Full Stack App.
- Describe the artifact the learner should produce and the constraints they must satisfy. Select Generate.
- In Preview, review the generated steps. Edit their titles/descriptions, reorder them, or add/remove steps. Review the Agent context and available chat appearance controls.
- In Instructions, write what the learner should do. In Rubric, review the grading criteria, descriptions, and weights.
- To request a broader change, describe it in the AI edit bar and choose Apply. Inspect the result, then Approve to save it or Reject to restore the previous configuration. Use Save for direct edits.
- In the learner view, choose Begin, work through the steps with the project Agent, inspect the resulting artifact, and submit when the task is ready.
For Full Stack App, the learner publishes the application and completes its live check before submitting the project.
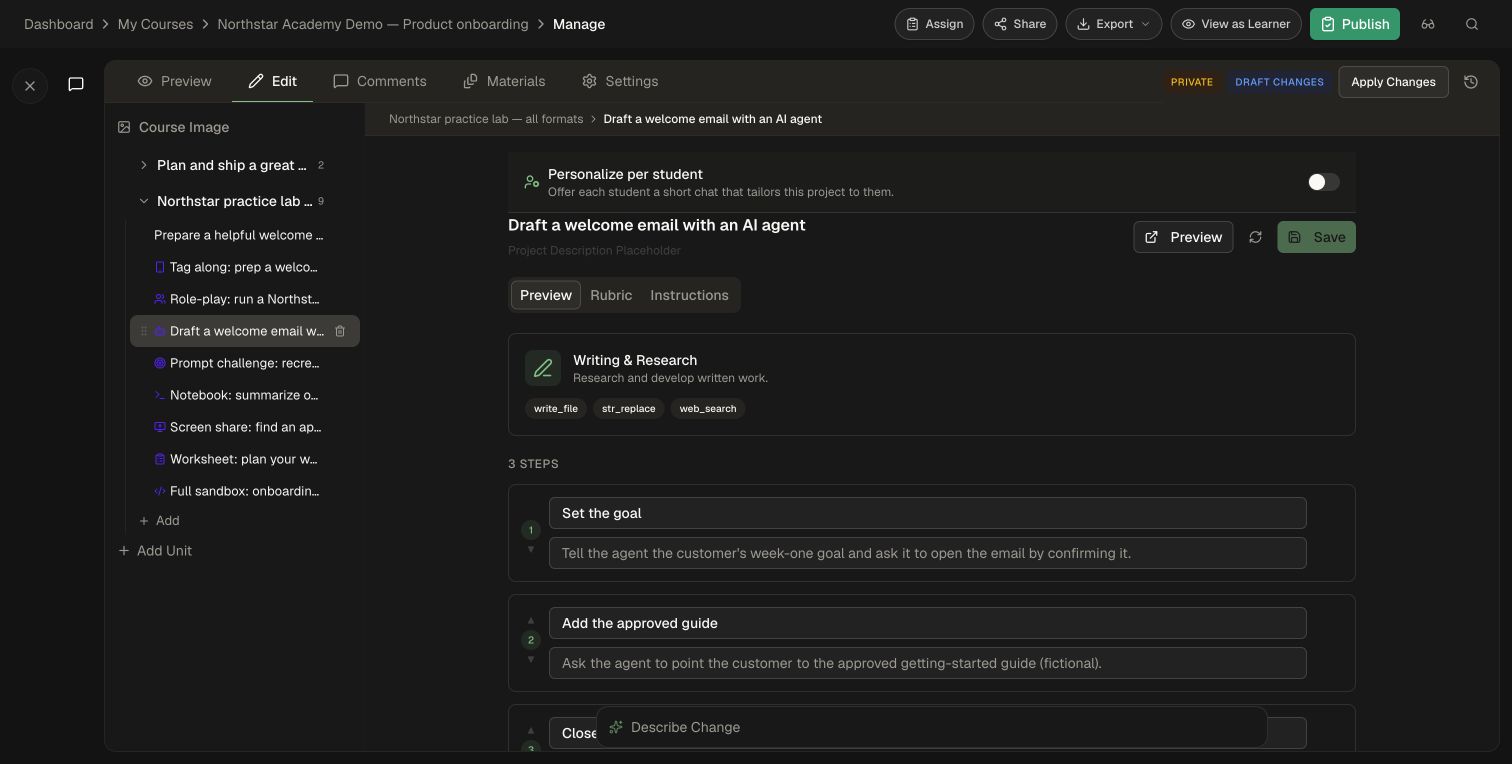
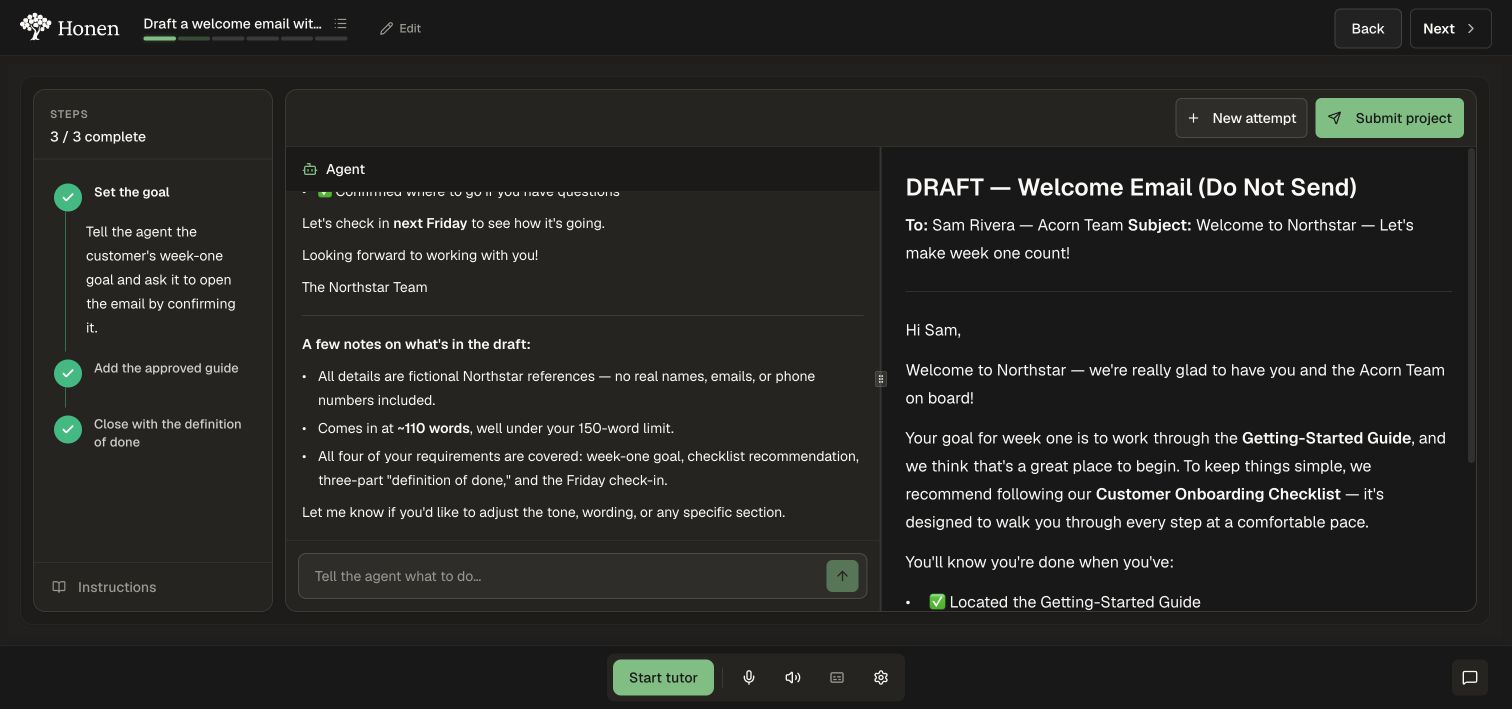
The demo below shows all three guided steps complete and a generated welcome-email draft. Review the artifact before selecting Submit project; finishing the steps is separate from submitting for grading.
Prompt Challenge: reproduce a reference
Use Prompt Challenge when the learner should iteratively prompt an AI to match an image or website reference.
- Select Prompt Challenge, then choose the image or website challenge option.
- Describe the reference and what a successful match should demonstrate. Choose Generate.
- In Preview, review the generated image or website reference and refine it to match the skill you want learners to practice.
- Review Instructions, Rubric, and the displayed passing score. Use the AI edit bar to request a change to the task or reference; inspect the result before approving it.
- Save direct edits and reopen the project to check that the reference and instructions remain correct.
- In the learner view, choose Begin. Describe the reference in the prompt box and send your prompt. Compare the generated image with the reference, then select View Feedback to see what to refine.
- Try another prompt if needed. When ready, select Submit project to receive the project’s rubric evaluation.
Use the match score and feedback to guide another prompt. Learners can refine their wording, compare successive results, and submit their strongest attempt.
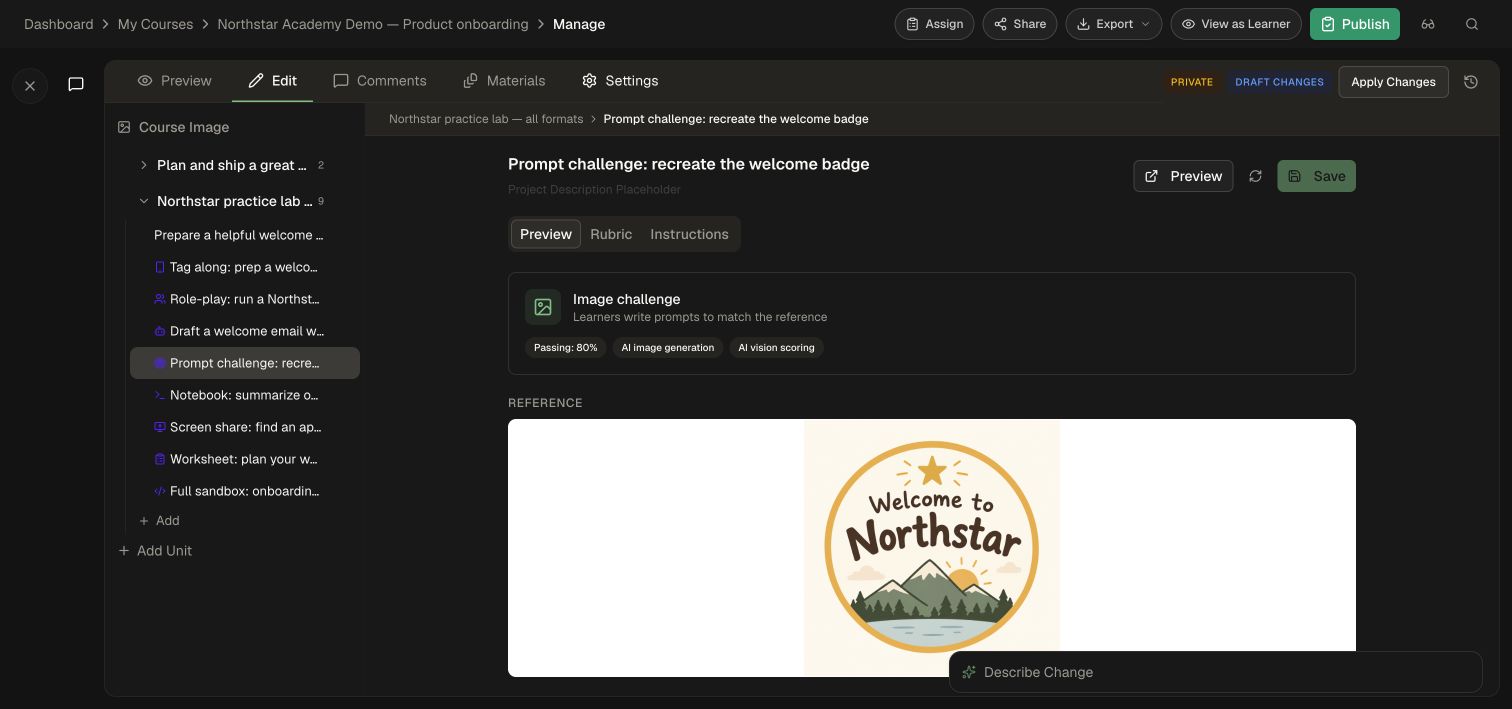
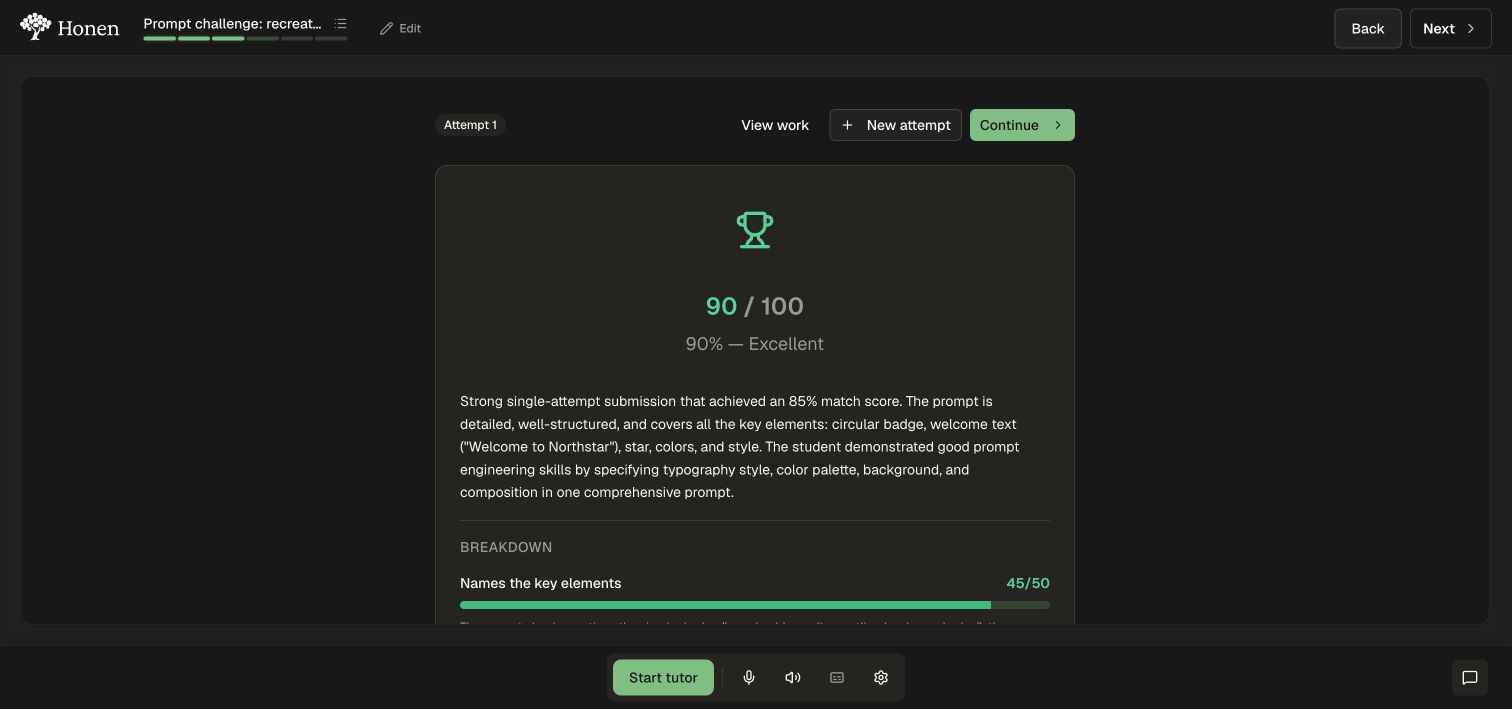
The example describes the badge’s shape, text, star, colors, and illustration style. The generated attempt appears beside the reference, with a visual match score and feedback.
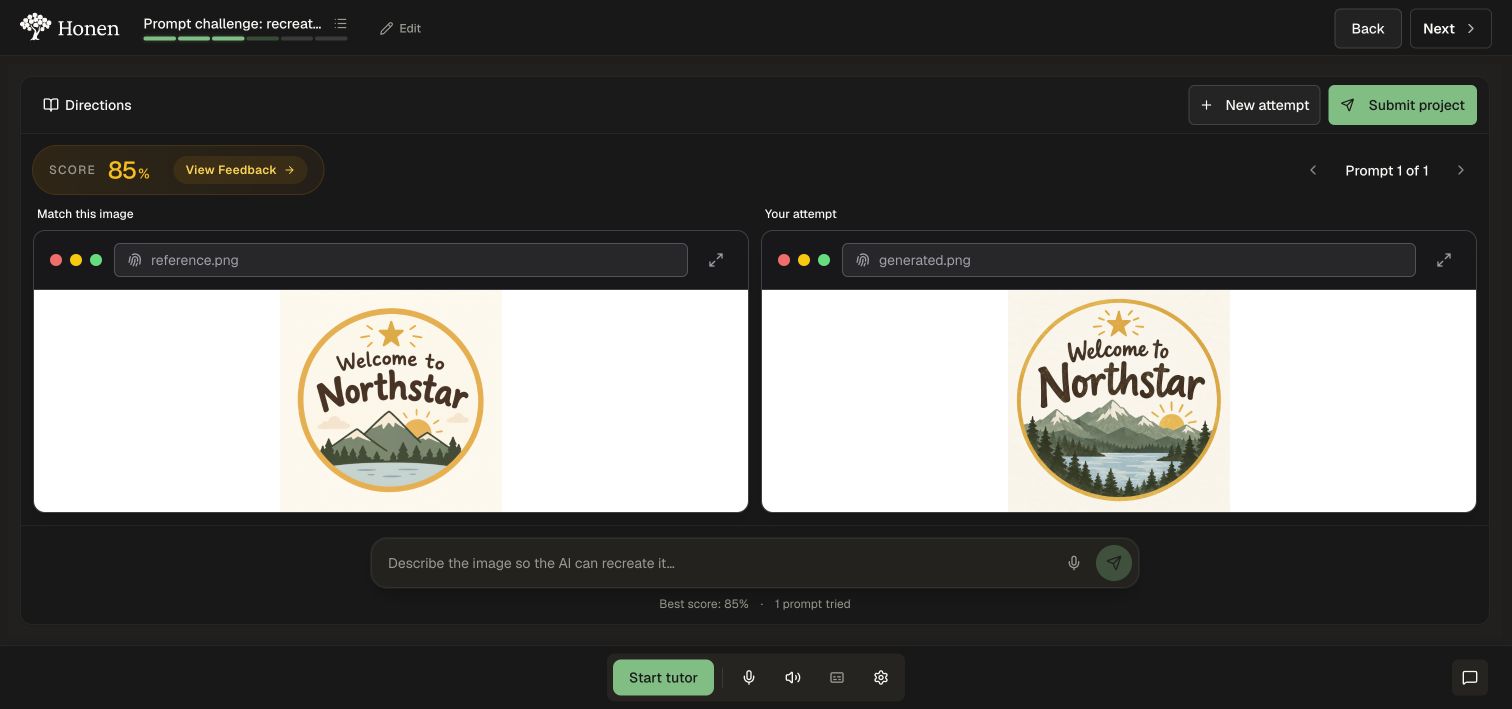
Submit project evaluates the work against the project’s rubric. This is a separate result from the image-match score: the example received an 85% visual match and 90/100 for its prompting criteria.
Code Notebook: program in cells
Use Code Notebook for code and Markdown cells with optional guided steps and test cases.
- Select Code Notebook and describe the programming task and language.
- Enter the required packages, decide whether to include guided steps, and specify a GPU only when the task needs one. These values guide generation; inspect the generated environment before use.
- Choose Generate.
- In Preview, edit the starter cells inline. Add code or Markdown cells, change their order, remove unnecessary cells, and lock cells that learners should not edit.
- Review guided-step completion criteria, test cases, expected results, and weights. Edit the package list and supported environment settings as needed.
- Review Instructions and Rubric, then Save.
- In the learner view, begin the notebook, run its cells, inspect output/errors, and complete the task. Submit is disabled while a cell is running.
Choose packages and compute resources for the exercise, then run the starter cells and test cases. Learners can use a new attempt when they want a fresh workspace.
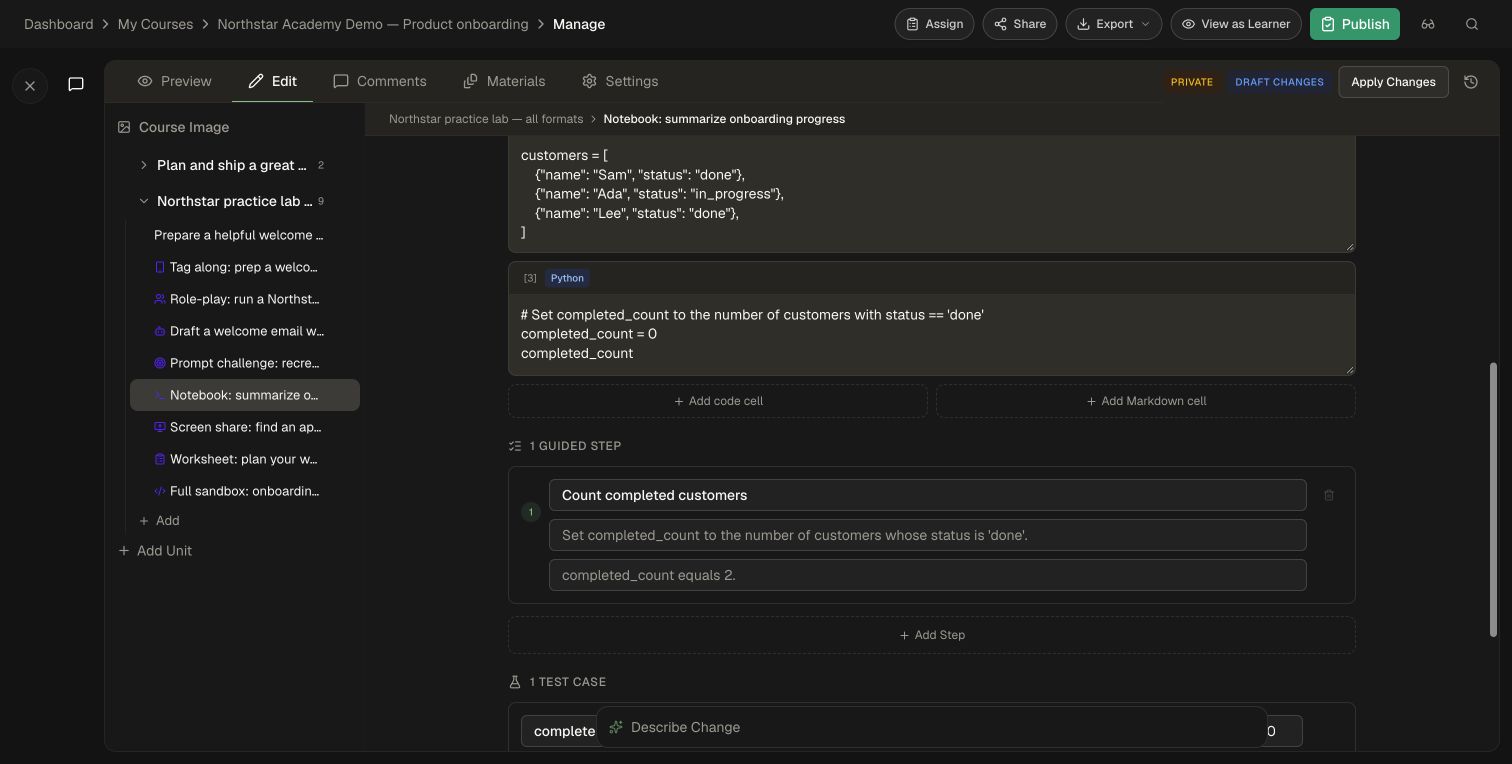
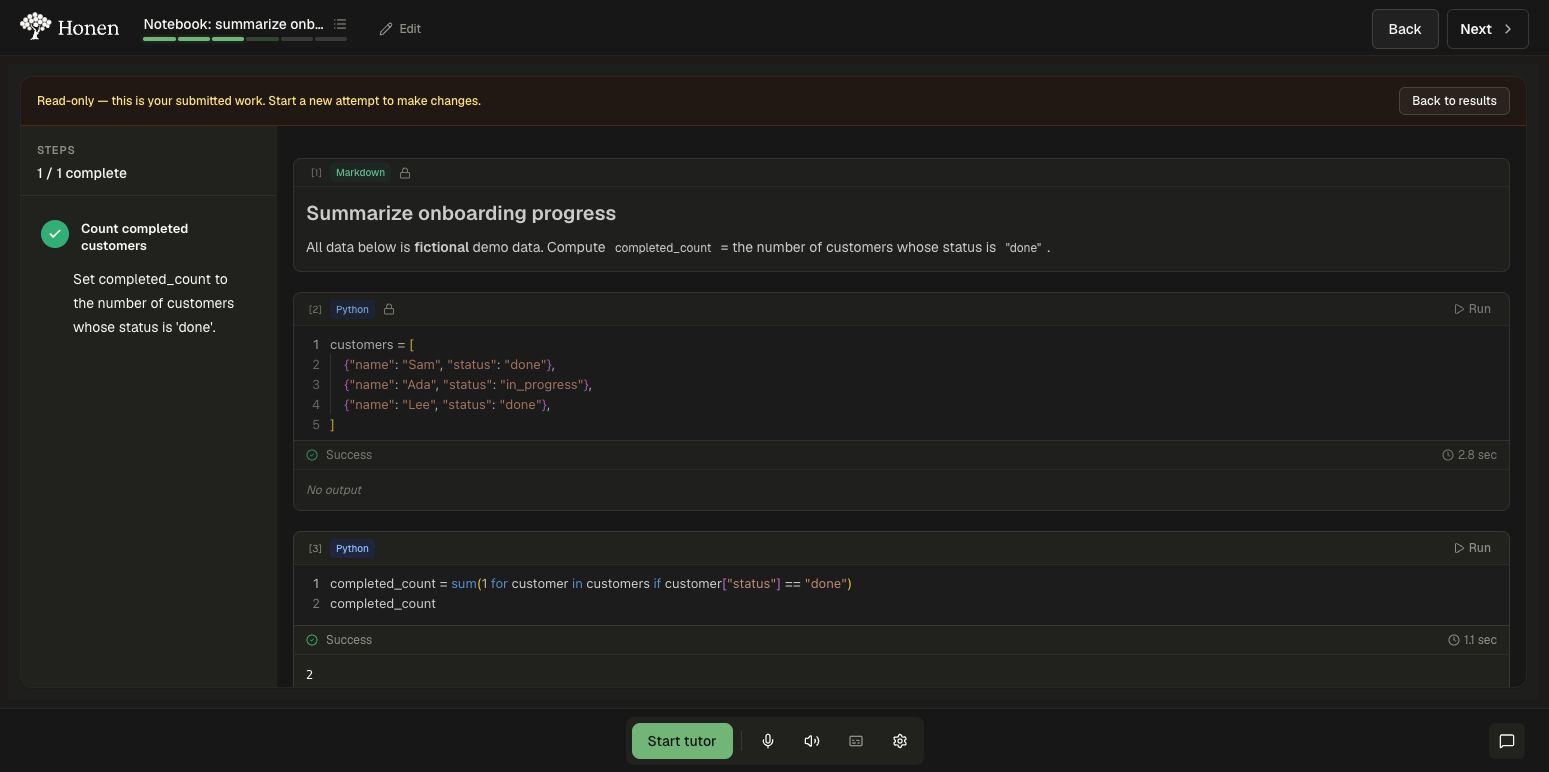
The demo reads three fictional customer records, counts the two with status done, and returns 2. Its submitted solution received 100/100. After submission, View work opens the notebook read-only. Use Back to results to return to feedback, or start a new attempt to make changes.
Screen Share: guide work in a real application
Use Screen Share when the learner performs the task in another application while sharing their screen with Honen.
- Select Screen Share. Under Create Screen Share, choose Describe, Record, or Video. For a hand-authored procedure, choose Skip and create the steps manually.
- In Describe, explain the task and optionally Attach file, then choose Generate Steps.
- In Record, follow the recorder's screen-selection and permission prompts. In Video, upload an MP4, WebM, or MOV recording up to 500 MB and choose Generate from Video.
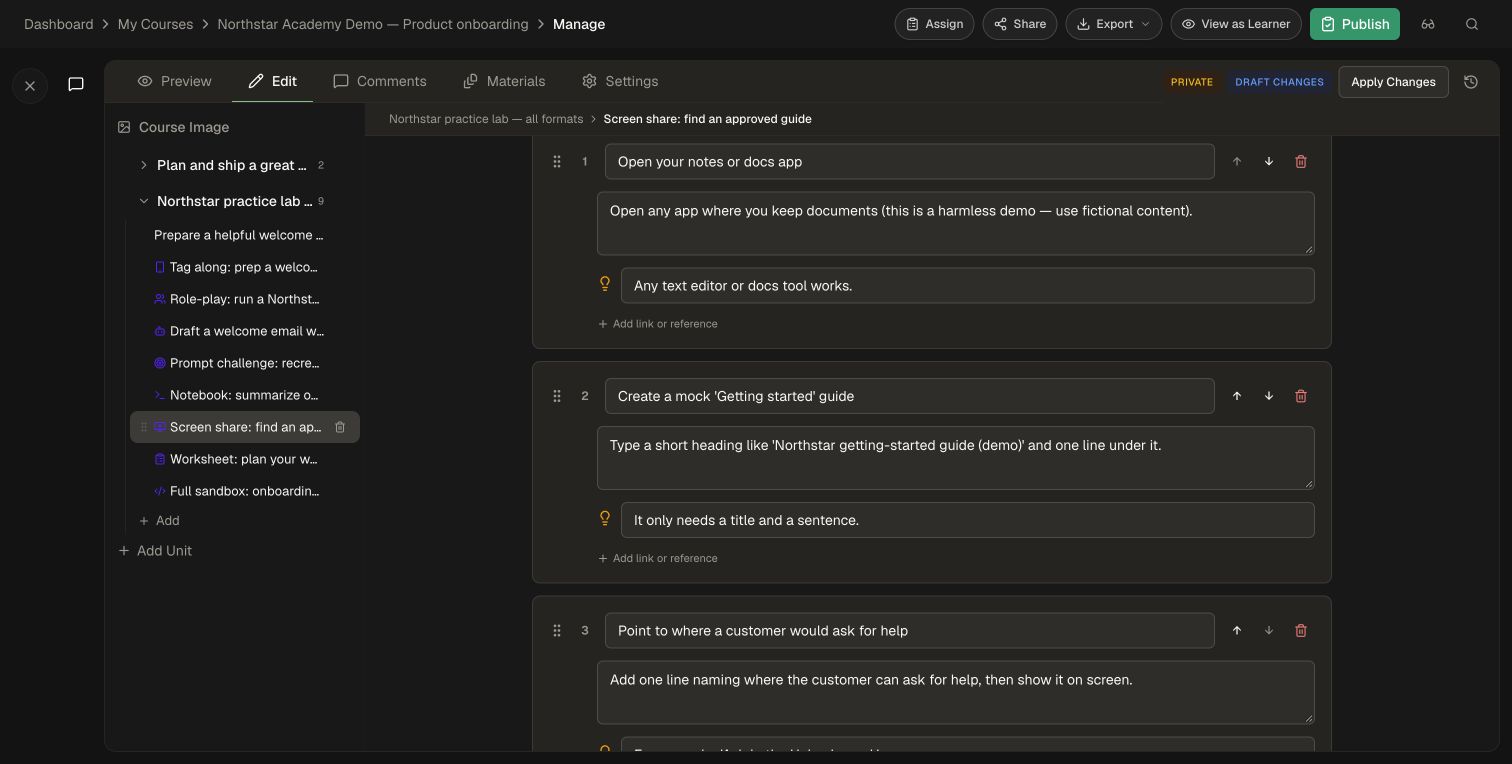
- Edit Title, Description, Greeting Message, and the ordered Steps. Each step should name an action visible on screen; add a hint for likely difficulties.
- Use Add Step, the move controls, and Remove step to refine the sequence. Use Add link or reference for supporting links or image URLs, then Save and reopen to verify them.
- In the learner view, choose Start session and share the appropriate application or screen through the browser picker. Check guidance and completion feedback against the real task.
Learners open the target application with their own access and share it through the browser. Choose Screen Share for live guidance, or Interactive Walkthrough below for a recorded practice experience.
Full Sandbox: build a development workspace
Use Full Sandbox for a provisioned development environment with starter files and grading checks.
- Select Full Sandbox. In Project, choose a template such as HTML, CSS, and JavaScript, React with Vite, Next.js, Python, Node.js, or Custom project. Write the project brief and steps.
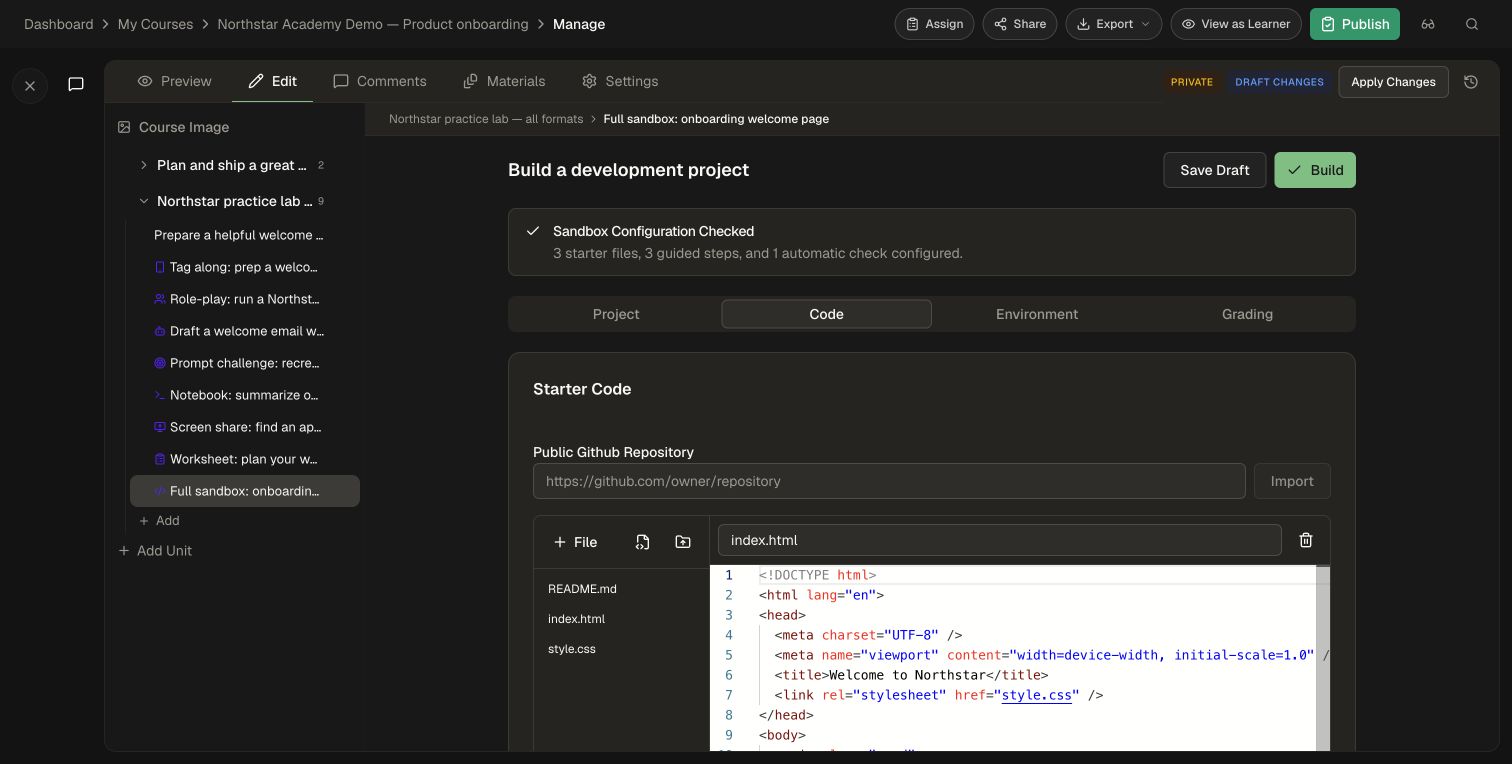
- In Code, edit starter files, upload files/a folder, or import a Public Github Repository. Review the imported files as the starting point for each learner’s workspace.
- In Environment, review the available editor tools/extensions.
- In Environment, configure the run command, preview port, compute, runtime, and any setup commands. Use dependencies and resources appropriate to the exercise.
- In Grading, add automatic checks with their descriptions, points, commands, and timeouts. Review the available check types and any AI review criteria.
- Choose whether grading finalizes the attempt or returns feedback while allowing continued work. Optionally provide a reference solution and a known-bad solution for grading self-tests.
- Choose Save draft, then Build to validate the configuration. Resolve reported errors. Editing the configuration invalidates the previous validation result.
- Complete the course publication flow to make the sandbox available to learners.
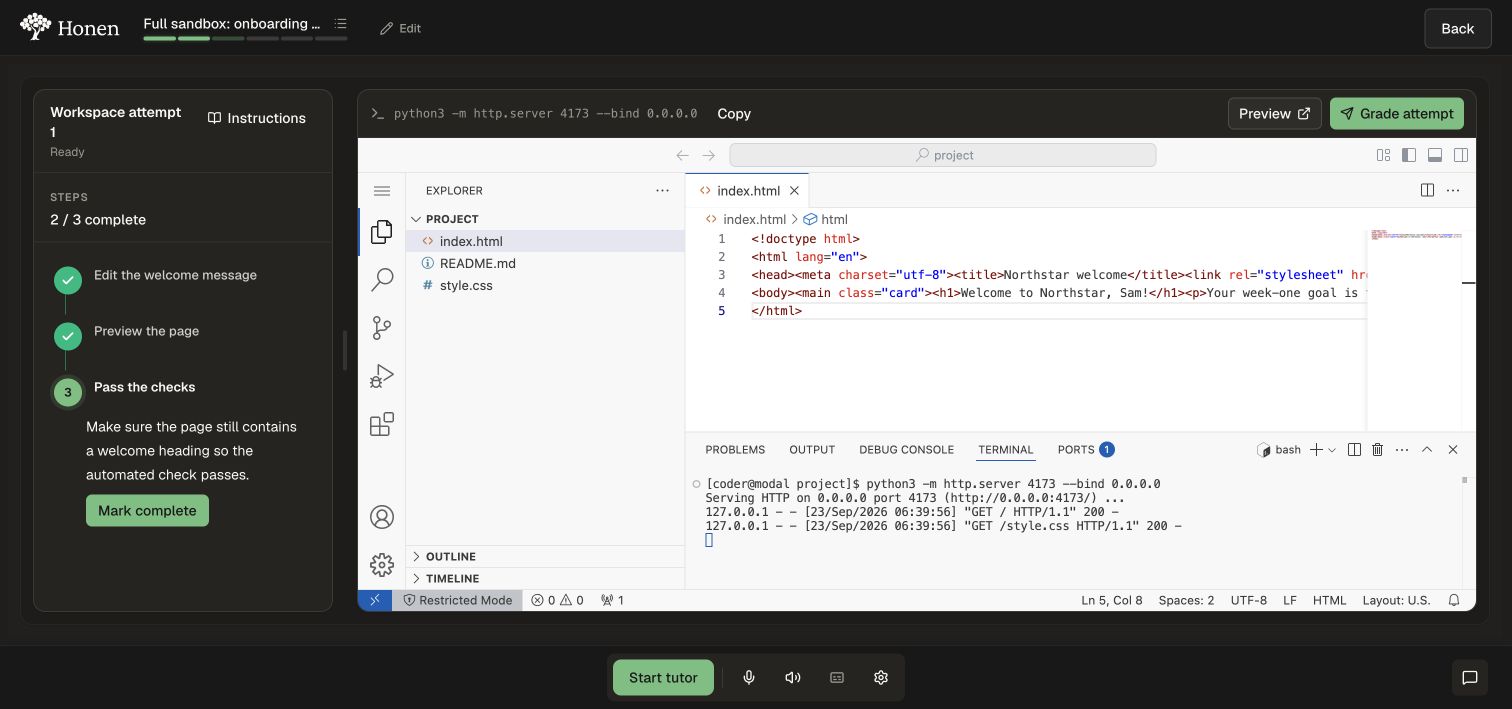
- In the learner view, create an attempt, wait for setup, open the editor, run the task, and use the available grading action. Review check results and any runtime errors.
Try the learner workspace to review the starter files, terminal, live preview, and grading results as one complete exercise.
The Northstar example uses three starter files and an automatic check for a welcome heading. Build reports Sandbox Configuration Checked before the learner opens a workspace.
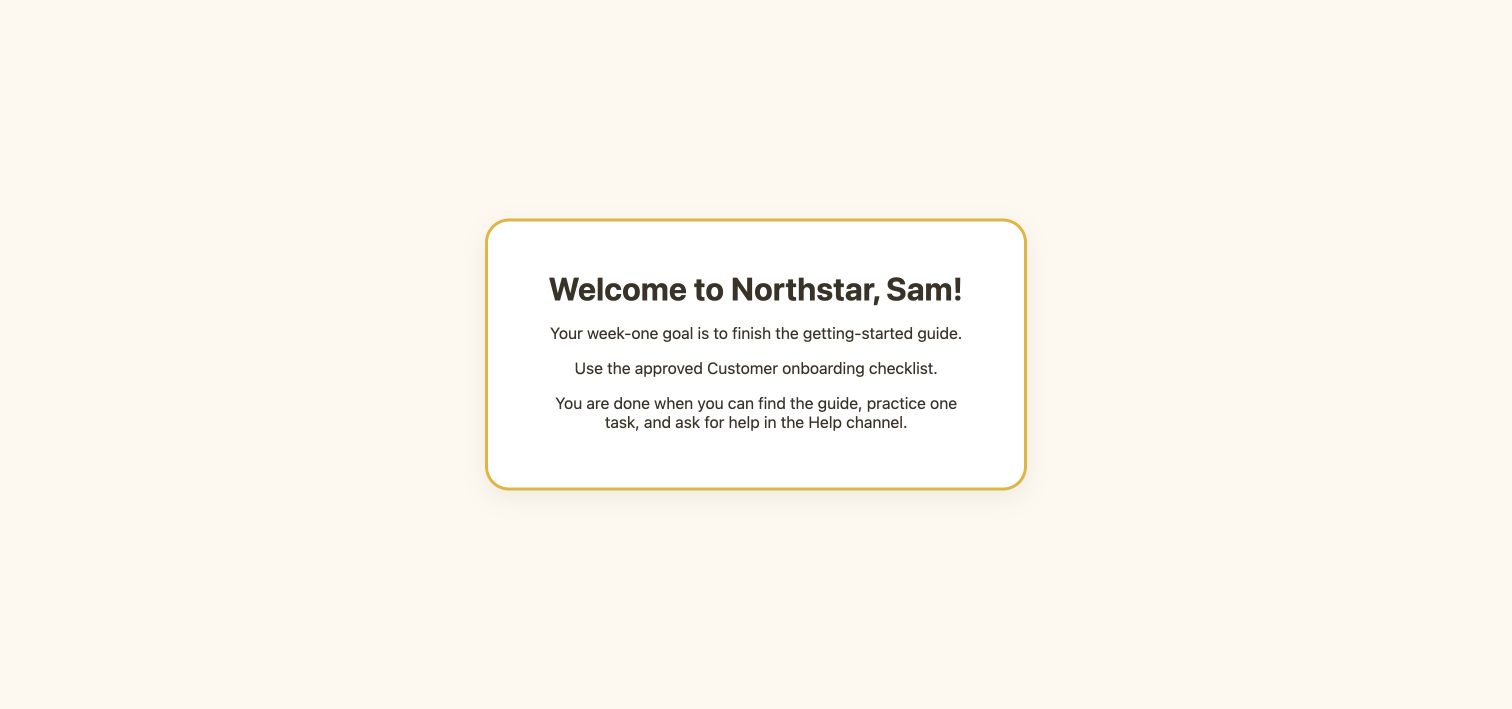
In the learner workspace, edit index.html with fictional customer details and save it. Run the configured development command in the terminal, then select Preview to inspect the page. This example uses python3 -m http.server 4173 --bind 0.0.0.0; use your own project's configured command and port.
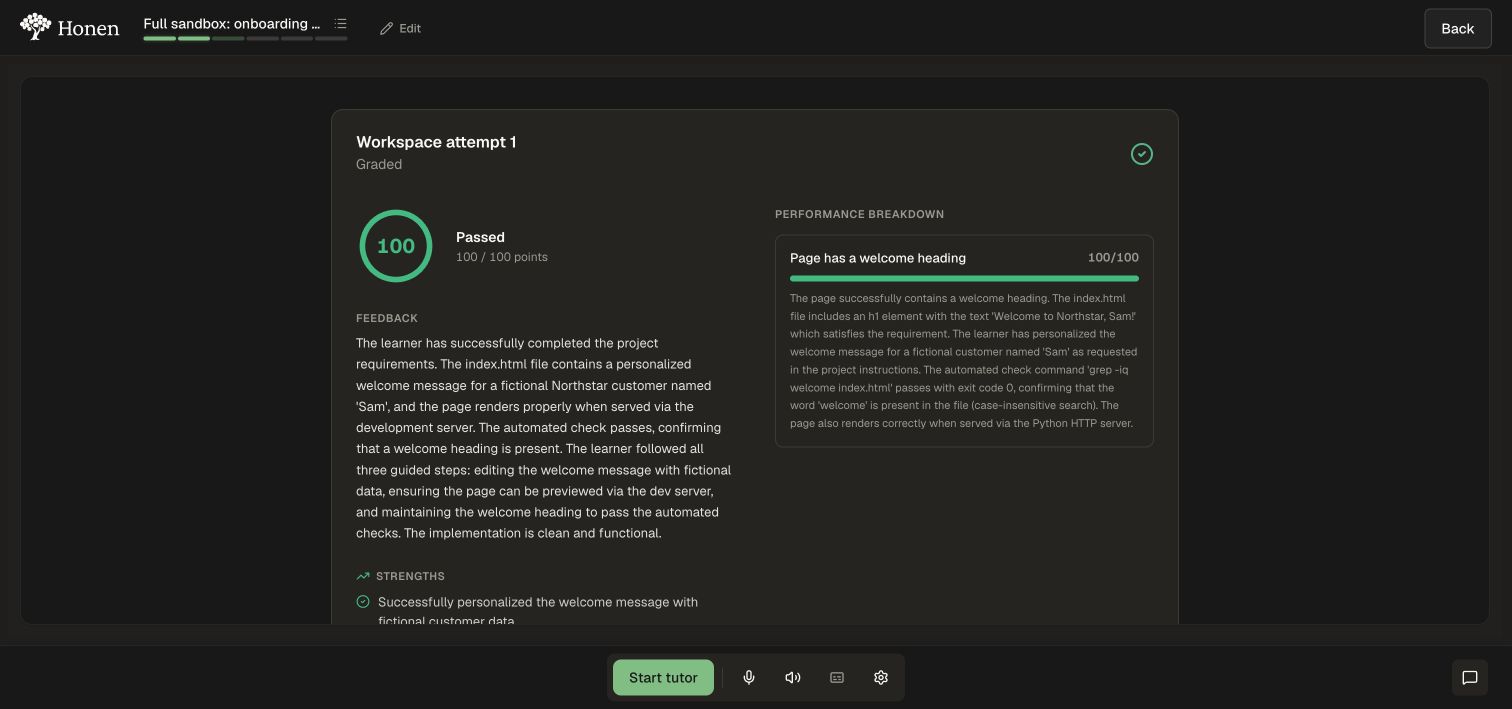
After checking the preview, select Grade attempt and inspect the result. This demo received Passed, 100/100, for the configured welcome-heading check. That result applies to this exercise and its rubric.
Interactive Walkthrough: create a clickable recording
Use Interactive Walkthrough for a recorded interface with guided targets. Prepare a screen recording of the exact workflow, using fictional or approved material.
- Select Interactive Walkthrough and choose Upload a recording. Select MP4, WebM, or MOV.
- Wait for recording analysis and saving to finish. Long recordings can take several minutes. Open the generated walkthrough when it is ready.
- Open Preview and click through every step. Check frame choice, sequence, target placement, and captions.
- Choose Advanced edit. Select a step and edit Step type, Target label, and Caption. Drag the highlight and click point onto the intended target, then choose Save step.
- To change the image, save current edits first, choose Choose frame, seek in Source recording, and select Use frame.
- Use Duplicate step, Move earlier, Move later, or Delete step to adjust the sequence. At least one step must remain.
- Choose Done editing, then replay the walkthrough. For continuous step types, the learner’s interaction advances to the next step in the recording.
- If public sharing is intended, review the complete recording-derived content before using Public embed → Enable embed. Copy the generated embed only after that review; Disable turns off the public embed.
Changing a recording is a different operation from correcting a hotspot. Save pending step edits before switching steps, changing frames, or uploading another recording. If the walkthrough changed elsewhere, reload the editor rather than overwriting a newer version.
Form: collect a structured response
Use a Form project when learners should complete a worksheet or submit several related answers. Describe the task and attach the source procedure, then review the generated questions and grading rubric. Preview the form, complete each field as a learner, and inspect the submitted feedback before sharing it.
Follow Create a Form project for the complete generation, direct-editing, learner submission, and feedback walkthrough.
Preview and deliver your project
Open the saved project as a learner, follow its instructions, and review the completed result and feedback. This gives you a final opportunity to refine the task, supporting materials, and evaluation criteria before assigning it.
For structured learner responses, follow Create a Form project.
See Activity and Project Types for the format overview, Add sources to a course for source preparation, Edit and review for the editor, and Publishing and review before release. Use Assignments to set required projects for a cohort.