
Start with the material that explains your work, then give Honen a clear outcome to teach. A policy document, slide deck, screenshot, recording, or dataset can each support a different kind of lesson.
Choose the path for your source
| Source | Bring it into Honen | What to check before building |
|---|---|---|
| PDF, including scans | Create → Attach, or Knowledge Base → Import file… | Extracted text, page order, tables, and diagrams. |
Word (.doc, .docx) |
Upload the document through Create or the Knowledge Base | Headings, numbered procedures, and any embedded images. |
PowerPoint (.ppt, .pptx) |
Upload the deck | Slide order and whether you want original pages or a newly written lesson. |
Markdown (.md, .markdown) or text (.txt) |
Import into the Knowledge Base, or attach to Create | Heading structure, lists, terminology, and referenced images. |
| HTML documentation | Sync a GitHub documentation folder | Semantic headings, repository image paths, and links between pages. |
| PNG, JPEG, WebP, or GIF | Upload through Create or Import file… | Legible labels and what the image should teach. |
| MP4, WebM, or MOV | Upload the recording, or use Record a product walkthrough or workflow | The spoken explanation, visible steps, and start/end of the procedure. |
| Google Docs, Slides, Sheets, or Drawings | Connect Google Drive and attach the imported Knowledge Base items | The document export; check spreadsheet print layout and diagram labels. |
| OneDrive/SharePoint spreadsheets or OpenDocument files | Connect the cloud source | The converted reading view and the specific sheets or sections to teach. |
| Local datasets, spreadsheets, code, or ZIP archives | Attach directly as course materials and ask the assistant to inspect the relevant contents | Name the files, sheets, columns, or code paths that matter. These uploads retain the original file for inspection. |
Knowledge Base PDF, Office, image, and video imports support up to 5 GB per file; Markdown and plain-text imports support up to 5 MB of text. Direct course attachments have a 1 GB per-file limit. For HTML with repository images, use GitHub sync; it resolves relative document and image paths together.
1. Attach and inspect the material
- Open Create → Attach and select your file, or choose Add from knowledge base for an imported source.
- For Knowledge Base items, check the intended document checkboxes and choose Add selected.
- Wait for the ready indicator on each attachment.
- If you imported through the Knowledge Base, open the document first and check the extracted body and images.
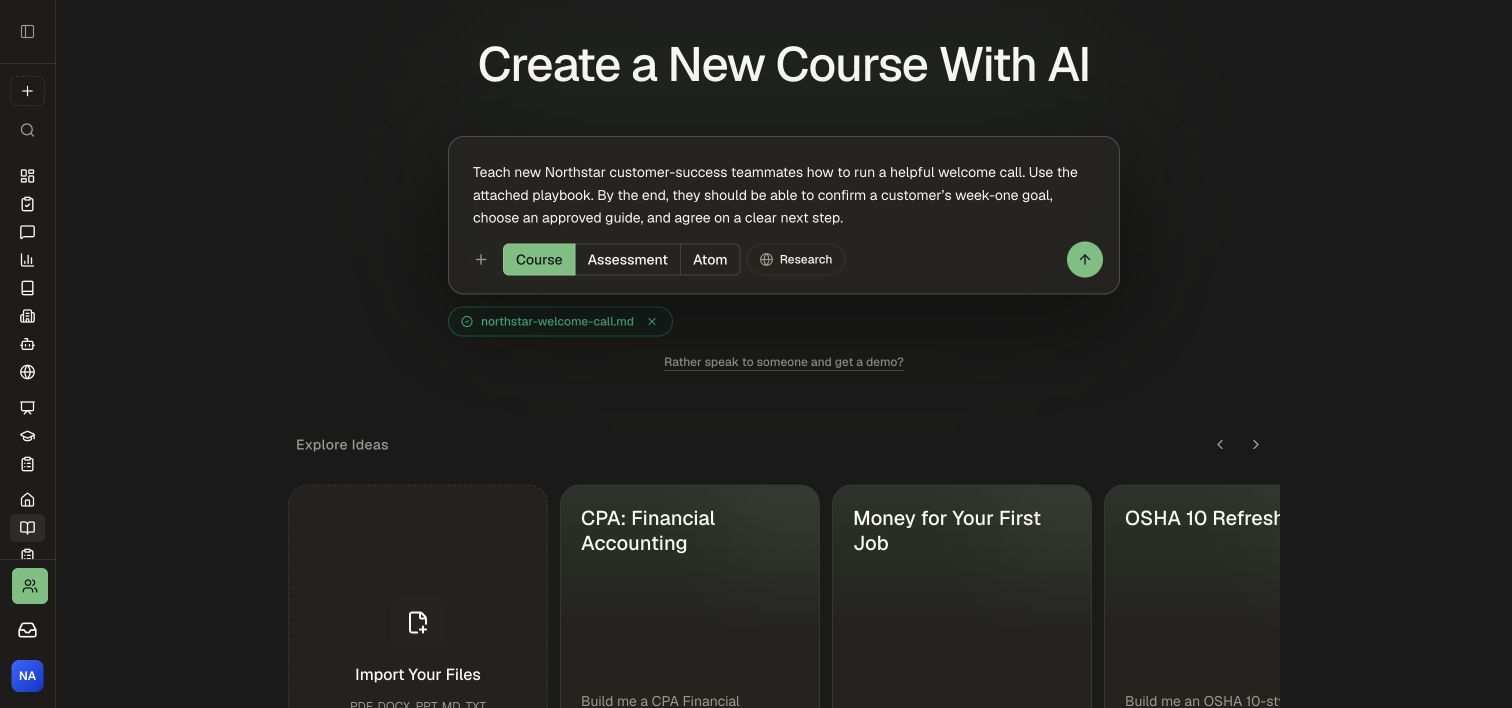
A direct upload keeps a copy of the file. Connected Knowledge Base sources can refresh from their original system; attaching them to a course takes a snapshot that you can later update with Refresh from KB.
2. Tell Honen how to teach from this source
Name the source, the audience, and what learners should be able to do. Add format-specific instructions where they help:
| Starting material | Example brief |
|---|---|
| Policy PDF or Word procedure | “Teach new support teammates when to escalate an issue. Use the attached policy's criteria and include practice choosing the next action.” |
| Slide deck | “Turn this deck into a short onboarding course. Use its original pages 2–5 for the lecture, then add a quiz about the decisions they explain.” |
| Markdown or HTML product docs | “Teach the first-project workflow from these docs. Preserve the exact control names and use the supplied screenshots beside the relevant steps.” |
| Screenshots or diagrams | “Use these annotated screenshots to explain the three setup decisions. Add captions describing what learners should notice.” |
| Training video | “Use the recording to explain the process in order. Include a reading with the key steps and a practice activity that checks the result.” |
| Screen recording | “Create an Interactive Walkthrough from this recording. Keep the visible screens and guide the learner through the clicks required to finish.” |
| Spreadsheet or dataset | “Inspect the named sheet and columns, explain how to interpret the results, and add a practical exercise using the same concepts.” |
| Code or repository material | “Use the README and the named code path to teach how this feature works, then add a Code Notebook or Full Sandbox practice task.” |
For original slides and diagrams, say whether to reuse the source pages or create new illustrations. For spreadsheets, say whether the course should explain the data or teach learners to work with it.
3. Complete setup and approve the outline
- Submit the brief with the Create course arrow.
- Answer the audience, starting-level, structure, size, and project questions that apply.
- Review the proposed topics and learning goals against your source. Ask for changes before starting the build.
- Choose Approve & Build when the plan fits.
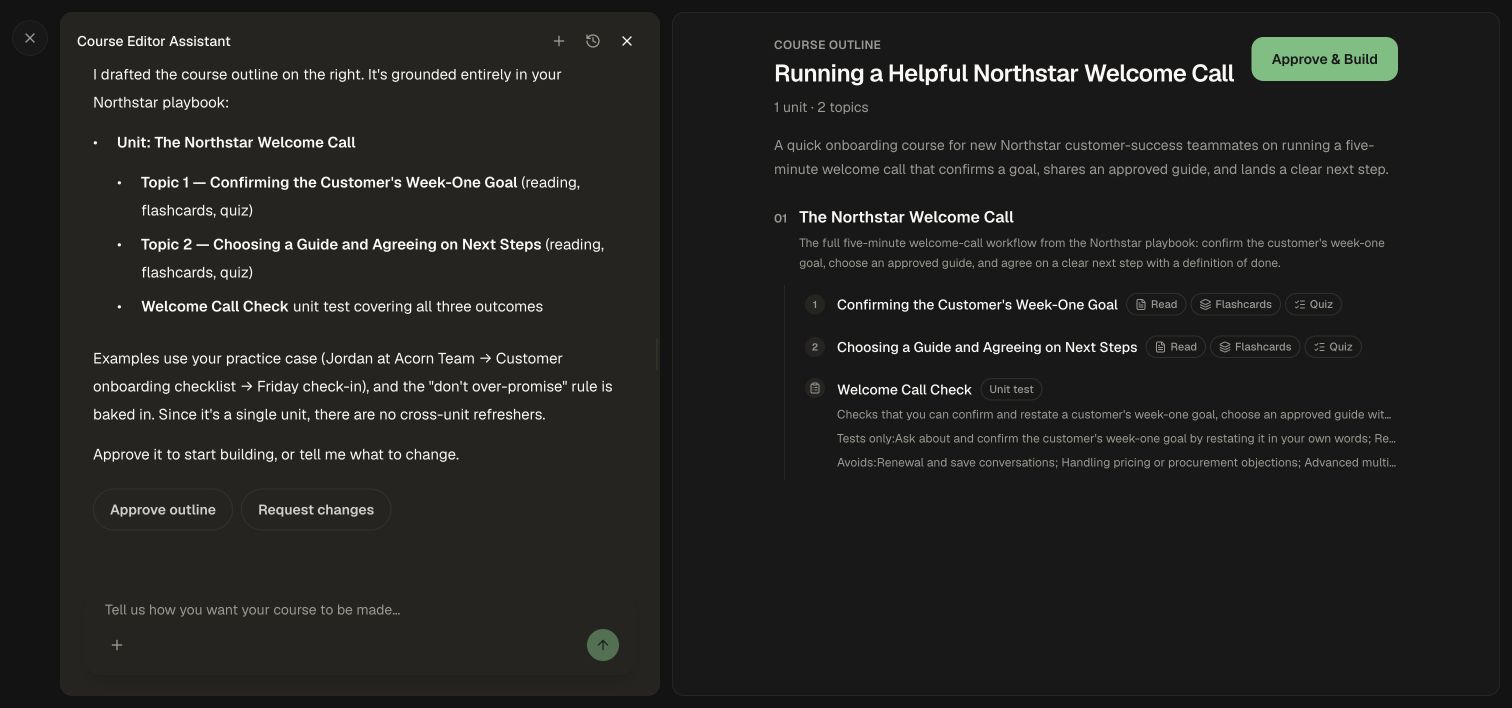
Choose a Course, Assessment, or Atom according to how much learning you need. Use Adapt a course to your audience for language, length, and assessment choices.
4. Review the result in the format learners will use
- Open Review & edit after generation.
- Read the source-based explanation and compare key facts with the original.
- Inspect each reused image or slide at its learner size.
- Play generated or uploaded media, review its transcript, and check source citations.
- Answer the quiz and try the project. Check the answer key, instructions, and evaluation criteria.
- Apply the reviewed draft, then follow Publishing and review.
For source revisions, use Build and maintain source-backed learning. Updating the source and sharing a revised course are separate steps in that workflow.
Add documents to an existing course
Open Materials and upload your files. Review the staged files, then select Start Processing. To add a new unit from them, enable Create unit from these materials, choose the topic count and activities, and use Start Processing & Generate Unit.
To update an existing topic instead, leave that unit-creation option off, wait for the material to be ready, and ask the editor assistant for the precise change. See Add sources to a course.