
Start with what people need to learn and the material they should learn from. Honen asks for missing setup details, proposes an outline, and builds the content after you approve that outline. You review the generated lessons afterward.
This walkthrough uses a fictional welcome-call playbook in Northstar Academy · Demo.
1. Add your source material
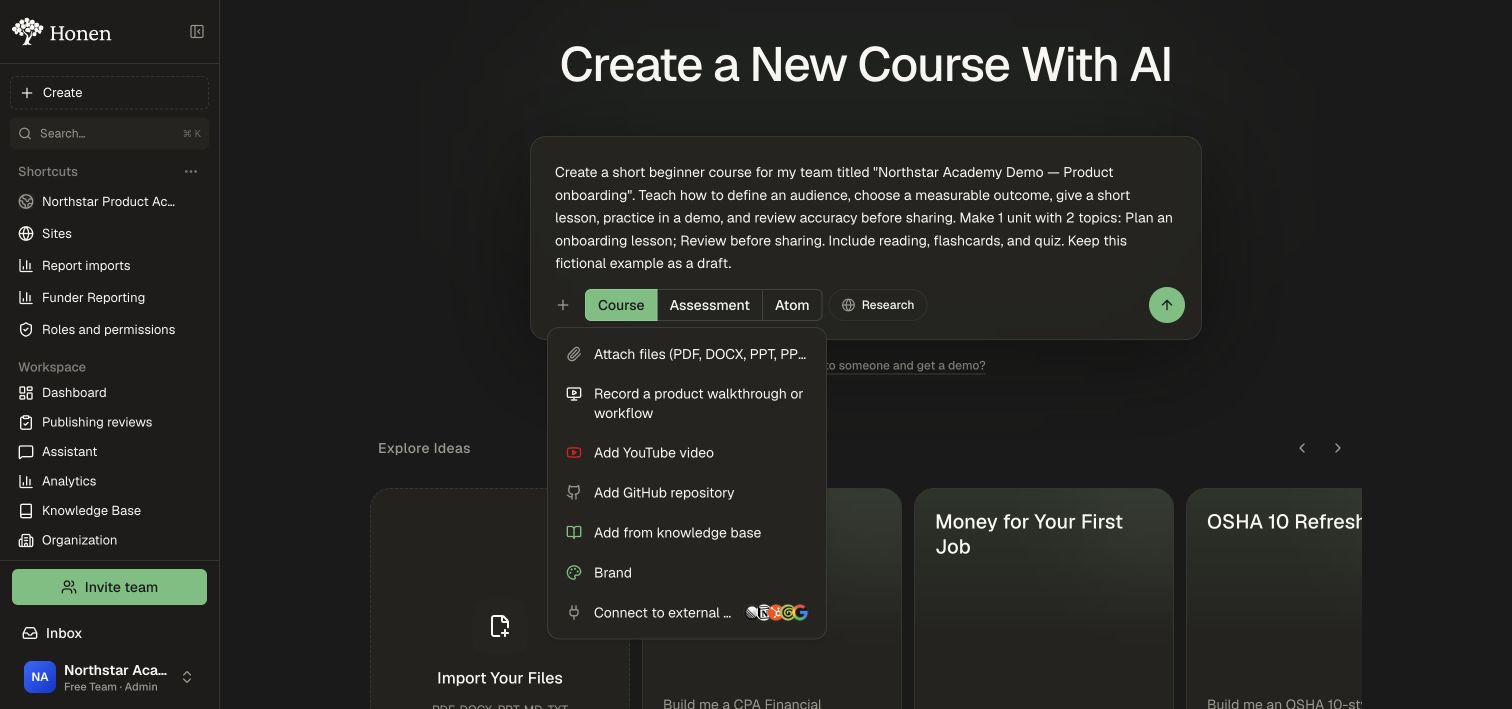
- Open Create and select Course.
- Open Attach → Attach files. Choose your playbook, slides, notes, or other source document from your computer.
- Wait for the file chip to finish uploading and processing. A ready attachment displays a checkmark; the create arrow is disabled while files are processing.
- If the material is already in your workspace, use Attach → Add from knowledge base, select the relevant documents, and confirm the attachment instead.
See Add sources to a course for the full upload and Knowledge Base walkthrough. For a source library shared across courses, start with Import files and links. A general-topic course can start with a prompt alone; a course about your own process needs your actual process, whether attached or explained in the conversation.
2. Describe the learning outcome
In the prompt, explain the subject, audience, and what learners should be able to do afterward. Identify which attached material to use. You do not need to prescribe units, topic counts, or activity counts in this first message; Honen can gather those choices during setup.
For example, with the playbook attached:
Teach new Northstar customer-success teammates how to run a helpful welcome call. Use the attached playbook. By the end, they should be able to confirm a customer's week-one goal, choose an approved guide, and agree on a clear next step.
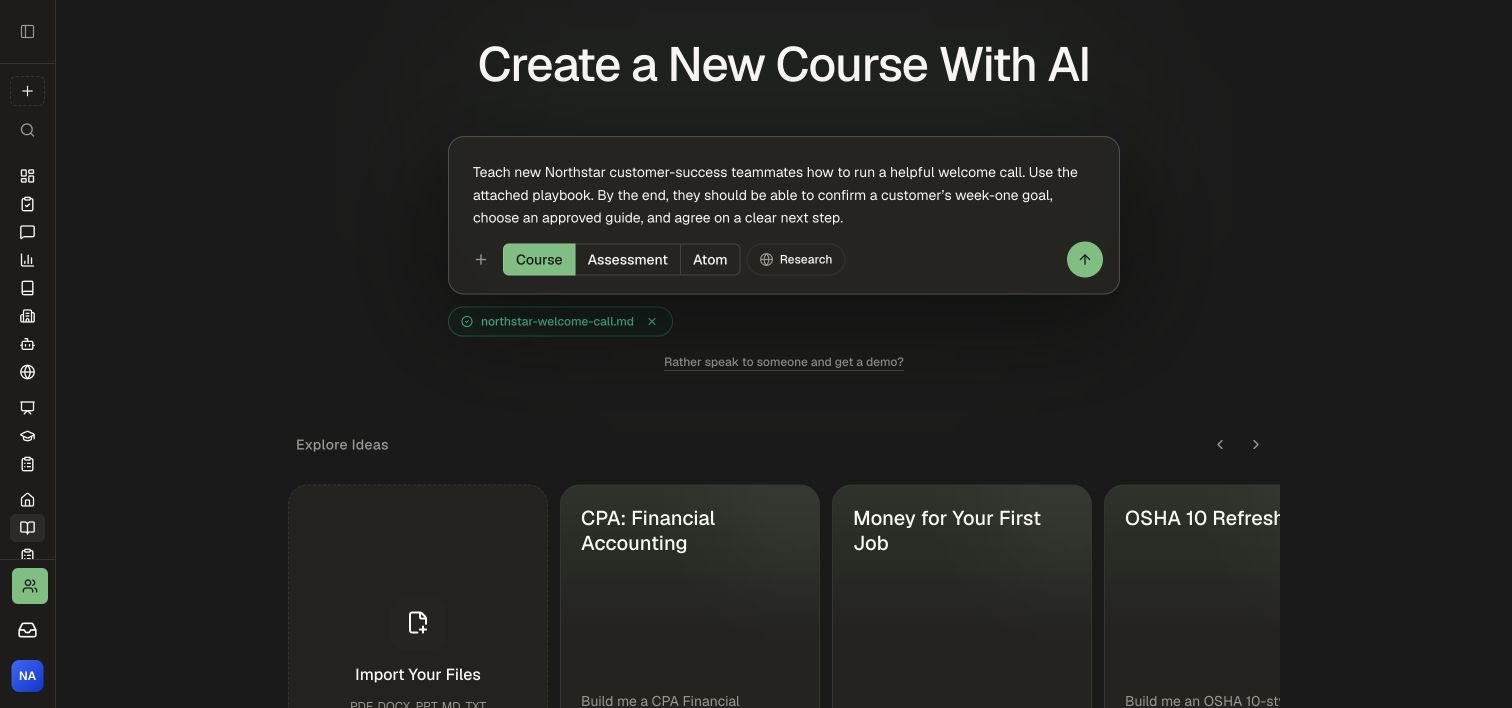
Select the Create course arrow when your prompt and attachments are ready. Choose Assessment or Atom instead when you want a focused assessment or one piece of content.
3. Answer the setup questions
Honen reads the available sources and asks for missing details one at a time. Depending on your brief and template, these can include:
| Setup choice | What to provide |
|---|---|
| Audience | Who will take the course: you, your team, or students. |
| Starting level | What learners already know about this subject. |
| Structure | The learning activities or project approach that fits the outcome. |
| Size | How many units and topics you want, using an offered size or a custom answer. |
| Project count | How many projects per unit, when you choose a custom structure with projects. |
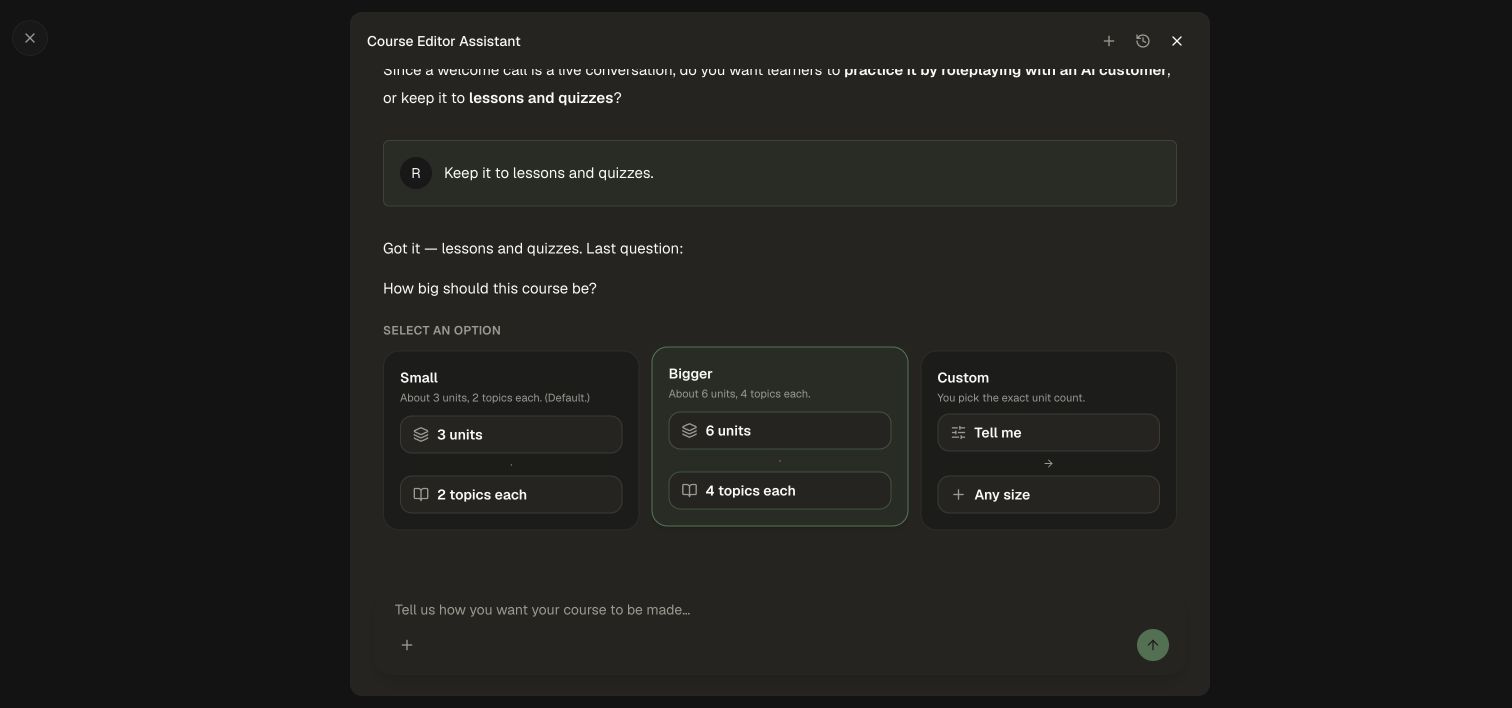
In this demo, Honen read the playbook, offered roleplay or lessons and quizzes, then asked for the course size. We chose lessons and quizzes and typed a custom size of one unit with two topics.
Use the offered buttons or type your answer. Details already supplied can be skipped, and a workspace template may supply its own questions. Finish setup and approve the outline to begin generating the lessons.
4. Approve the proposed outline
- Read the proposed title, units, topics, learning goals, activities, tests, and projects.
- Check that the planned content supports the outcome and uses the right sources.
- Request changes in the conversation if the plan needs work.
- Approve the outline when it is ready.
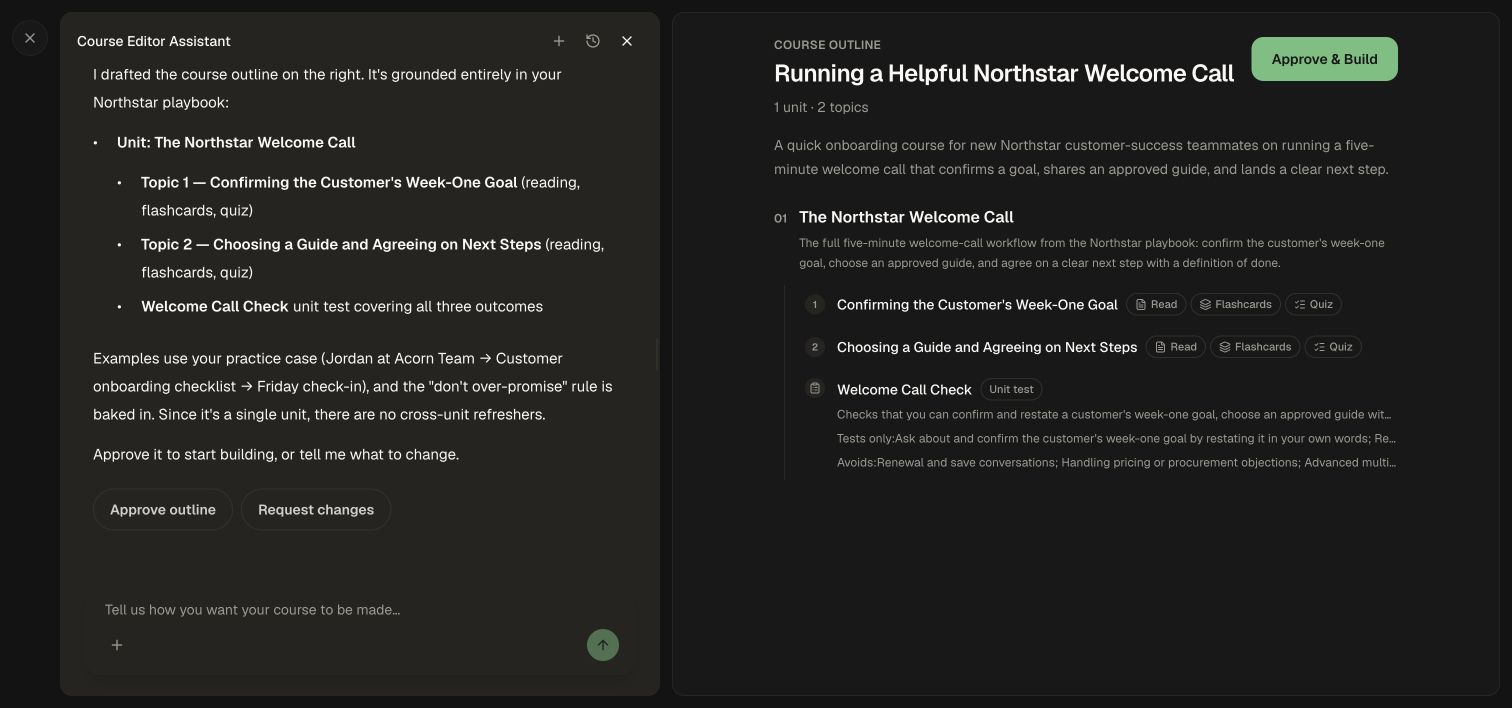
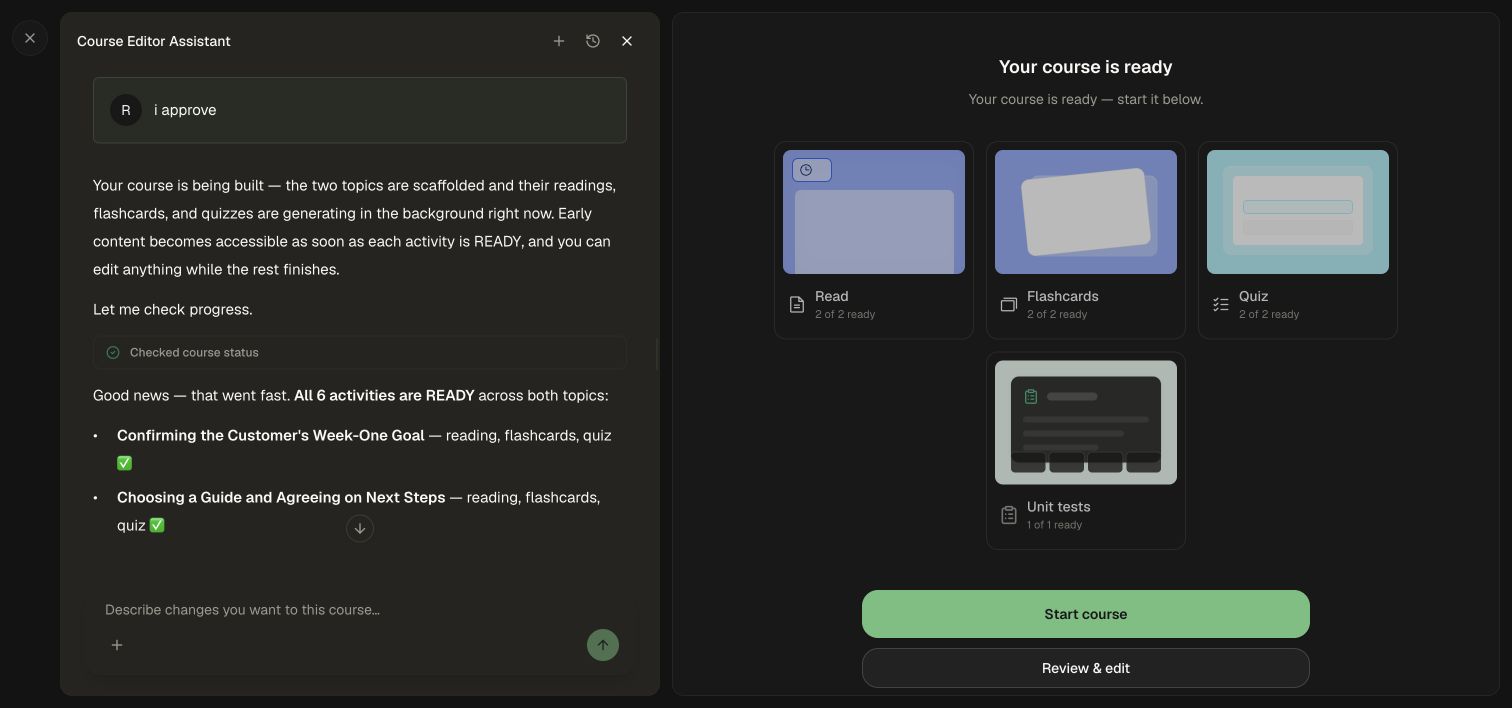
Outline approval starts the build. Honen creates the planned lessons and activities, then brings you into the editor to review the finished content.
5. Review after the build
- Follow the activity status as Honen builds your course.
- Open Review & edit when the completed-course panel offers it.
- Use Preview to read lessons and try activities, then Edit or the course assistant to make changes.
- Check factual claims, answer keys, source references, media, and learner instructions before sharing.
Follow Edit and review a course, Edit readings and media, and Configure course settings. Publishing and review is a separate workflow from approving the initial outline.
Tips for a strong first course
Use a clear learning outcome and current source material. Wait for attachment processing before selecting the create arrow, answer the setup questions in your own words, and use the outline conversation to refine scope. During the build, follow each activity's status. Once ready, review the lessons from the learner's perspective before delivery.