
Give each team the access it needs to build, teach, and learn. Configure permissions at the workspace, group, course, Knowledge Base folder, or Agent level.
1. Inspect an existing role
- Open Organization → Roles & Permissions.
- Select a role in the Roles list.
- Read its description and permission groups.
- Use Search permissions to narrow the list to a capability such as
knowledge.
Admin is a locked system role. Other roles expose their own configurable permissions. Read a permission's description before changing it; labels marked cascades apply to descendant scopes.
2. Prepare a custom role
- Choose New role.
- Enter a clear Name and Description.
- Search for the relevant permission family.
- Select only the capabilities the role needs.
- Review Limits & usage if the role should have activity or usage caps.
- Choose Create role when the definition is ready. Creating the definition and assigning it to people are separate tasks.
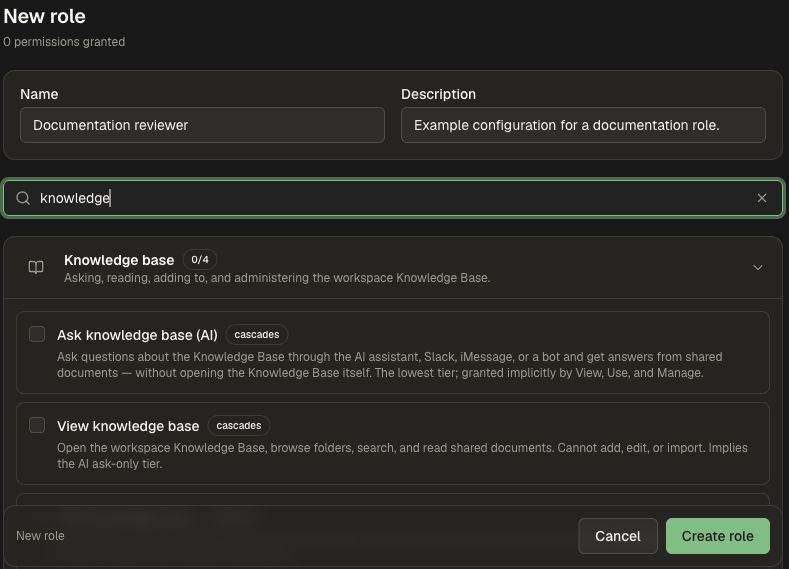
Use the permission search to build a role around a specific job, such as maintaining approved learning sources.
3. Choose the right Knowledge Base level
| Permission | Intended capability |
|---|---|
| Ask knowledge base (AI) | Ask about shared documents through an assistant or connected channel. |
| View knowledge base | Browse, search, and read accessible shared content. |
| Use knowledge base | Add, create, and edit accessible knowledge content. |
| Manage knowledge base | Administer shared folders, item permissions, and versions. |
Higher Knowledge Base tiers include lower ones: Manage includes Use, Use includes View, and View includes Ask. The role editor automatically selects implied permissions. A role does not replace a document's sharing policy. Verify both the user's capability and the folders shared with them.
4. Review public delivery separately
Before publishing a Site, select only the folders and catalogs intended for its audience. Keep private operations material outside the public documentation tree. In Settings, review visibility and the sign-in options; Public only removes registration from open documentation sites.
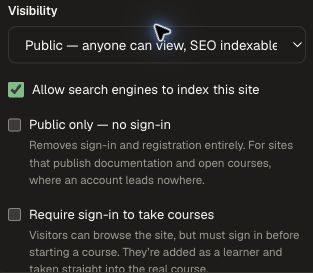
A repository can remain private while selected imported documentation is published. Referenced screenshots become part of that published content, so use fictional examples without credentials or private customer records.
Tips for a smooth setup
Match each action to its permission at the intended scope, and confirm the workspace has the feature enabled. For a custom Agent, configure the selected content and permitted actions as well as its written instructions.
Use People, Groups and Workspaces to prepare a member invitation. For public content, follow Publish an academy.