
Package your team's preferred course format into a reusable starting point. Templates combine instructions, setup questions, activity choices, Skills, and Knowledge Base folders so authors spend their time on the subject they are teaching.
You need a team workspace and Manage course templates permission. The example uses a fictional Northstar Academy onboarding template.
1. Create a template
- Open Organization → Rules, Skills & Templates → Templates.
- Select New template.
- Enter a Name authors will recognize and a Short description explaining when to use it.
- Choose Content type: Course, Atom, or Assessment.
- Write Agent instructions describing the learning goal, tone, structure, and expected result.
- Add a Background prompt for guidance applied behind the scenes. It does not fill the author's message box.
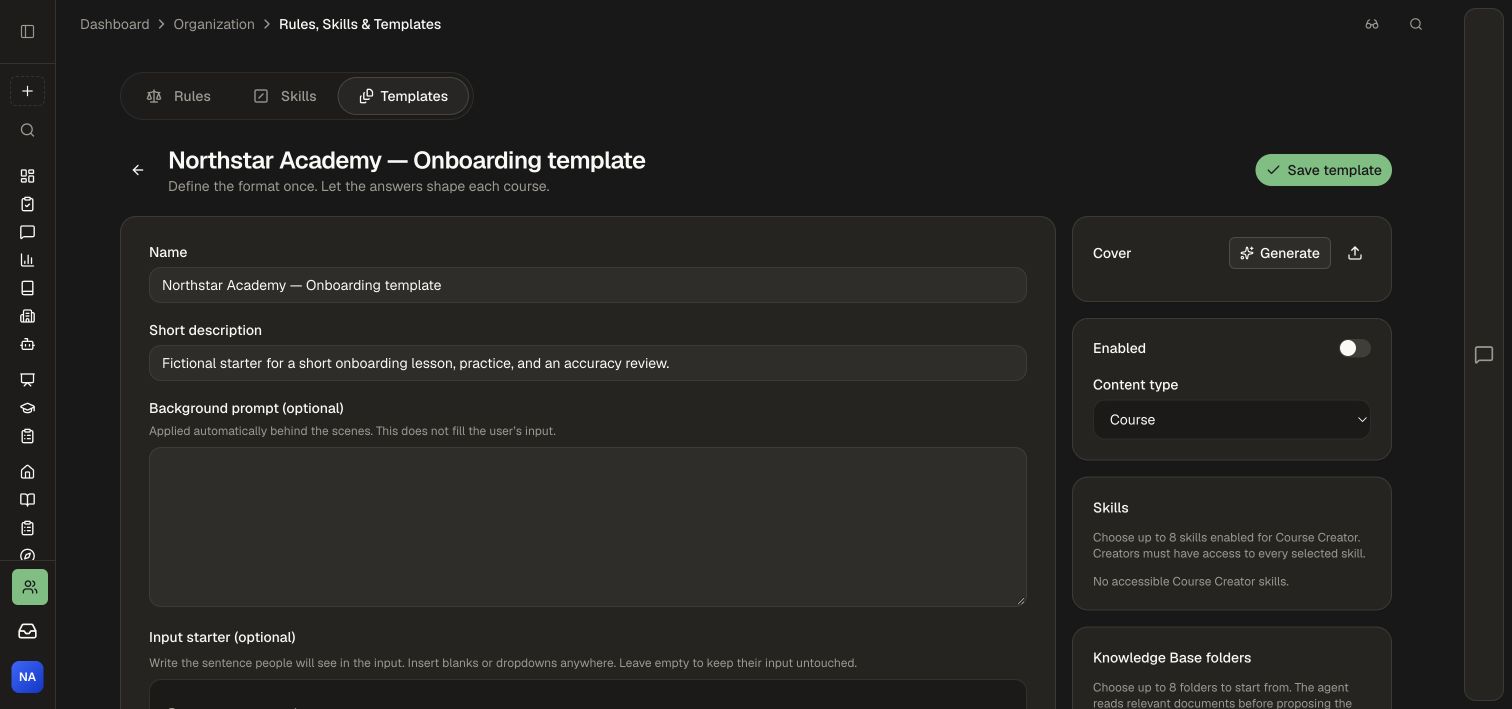
2. Make the opening prompt easy to complete
Use Input starter to combine ordinary text with fields authors fill in.
- Write the fixed parts of the brief, such as “Create onboarding for…”.
- Select Add blank for an open answer such as the team's name.
- Select Add dropdown for a defined choice such as the audience or experience level.
- Give every field a clear label. Each dropdown needs at least two distinct options.
A starter supports up to eight fields. Keep background instructions in their own field so the visible starter stays focused on decisions the author needs to make.
3. Define setup questions and structure
- Add up to three Custom setup questions. Use the optional guidance to explain how each answer should affect the result.
- Leave custom questions empty when you want the assistant's usual setup questions for missing decisions.
- For a Course, optionally set Number of units and Topics per unit.
- Choose Activity types, or leave them open for setup. Courses support reading, flashcards, quiz, game, lecture, podcast, Jam session, comic, and video choices. An Atom can select up to three activity types. An Assessment uses tests or projects instead of these learning activities.
- Put requirements such as “reading-only; no unit tests” in Agent instructions, then check the proposed outline when using the template.
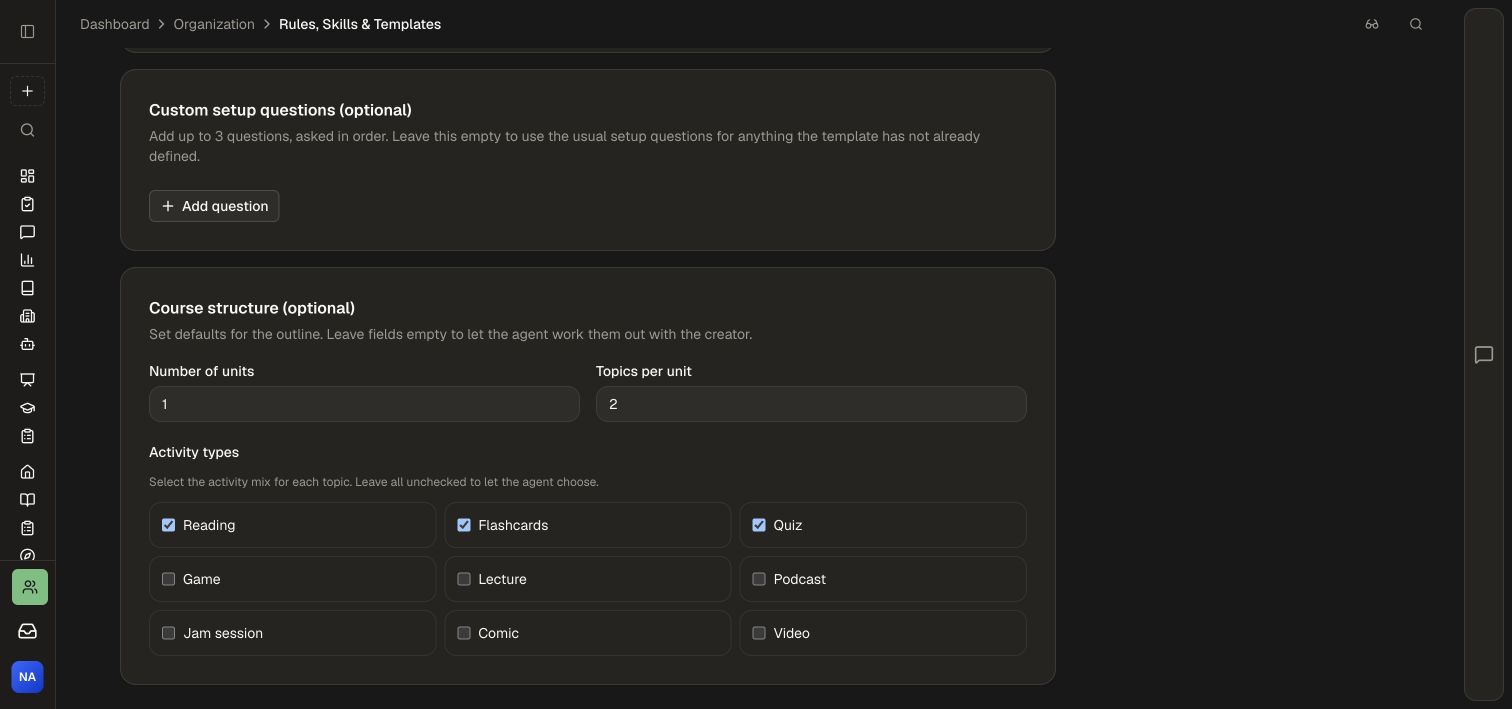
4. Add reusable guidance and source folders
- Select up to eight enabled Skills that apply to Course Creator and whose instructions should accompany the template.
- Select up to eight Knowledge Base folders containing the relevant source material.
- Upload a cover or generate one using your workspace Brand.
- Leave Enabled off while the template is being prepared.
- Select Save template and reopen the saved item to check it.
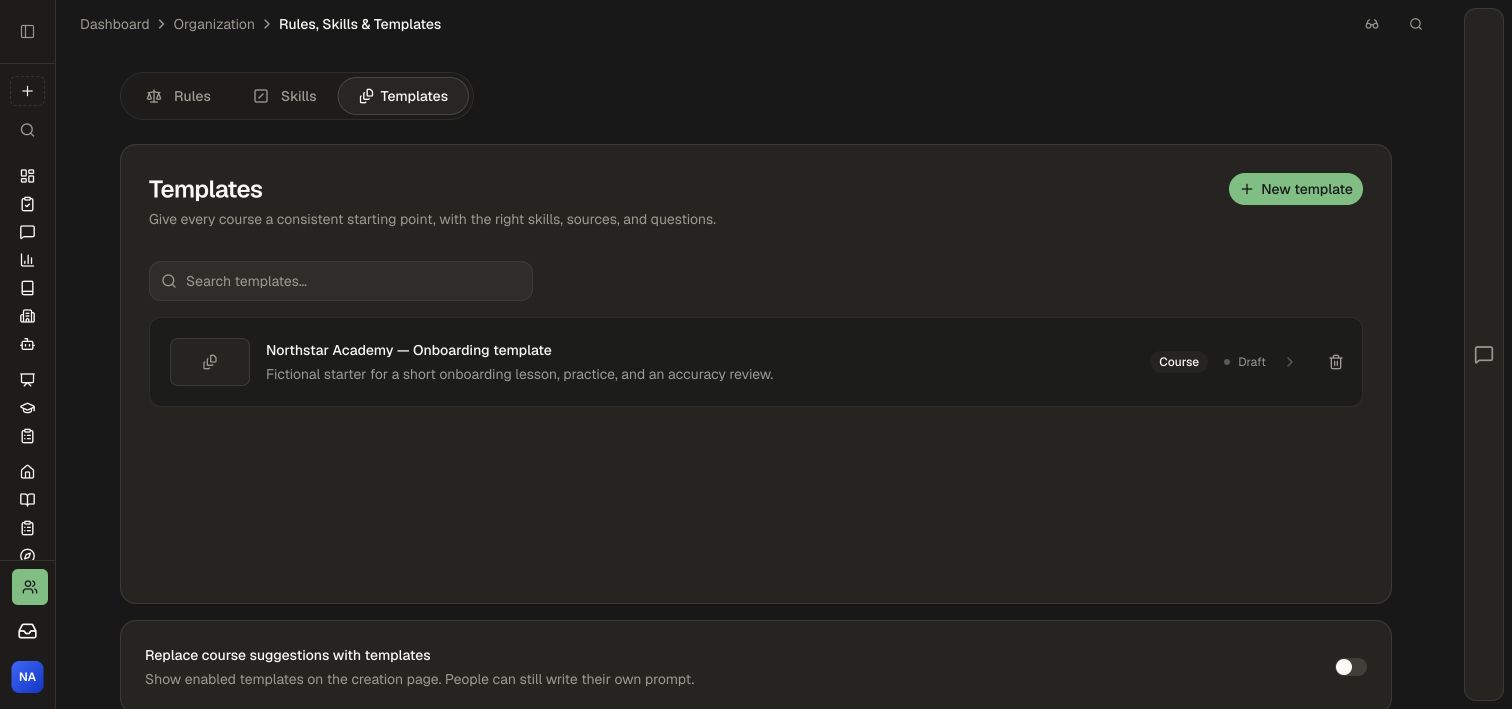
Authors need access to the selected Skills and source folders. A template selection does not grant access to those resources.
5. Offer the template to creators
- Open the saved template, turn on Enabled, and save.
- In the Templates list, turn on Replace course suggestions with templates to offer enabled templates as suggestions on the creation page.
- Open Create, choose the relevant content type, and select the template.
- Complete the starter fields, add the subject and sources, then send the brief.
- Answer setup questions and review the proposed outline before approving the build.
Selecting a template sets its content type. Clear the selection to change the type or return to your own prompt. Authors can still write a brief without a template.
Edit, pause, or retire a template
Open a template from the list, change its fields, and select Save template. Turn Enabled off to keep a draft while removing it from the offered choices. Use the template's delete control when retiring it permanently, then confirm the named item.
A course keeps the template instructions saved with it even if the original template is later removed or unavailable. Changes to the template are therefore a starting point for future use, rather than an automatic rewrite of existing courses.
Apply a template to an existing course
- Open the course editor and Settings → General → Course template.
- Attach or change the template.
- Ask the editor assistant for the changes you want to make.
- Preview the result and publish through the course's normal review process.
The selected template guides future editing; choosing it keeps the existing course content.
Continue with Create your first course, Skills, or Brand standards.